
Nurture for Frontline Staff
This is an extensive guide on all the features available to frontline/direct support staff. If you have yet to set up your Nurture account, please read the Setting up your Account article for instructions.
About Care Providers
In Nurture, the Care Provider user role are frontline staff who provide direct support to clients. This includes:
Child and Youth Care Workers,
Foster Caregivers
As a Care Provider, Nurture is designed to help you seamlessly access client information, document activities, report incidents, and communicate with your team.
This guide will explain all the features available to you within Nurture, as well as your specific access level and permissions based on your role.
Clients
Your home view is the Client list page:
Within a Client page, you will see a list of clients you provide care to.
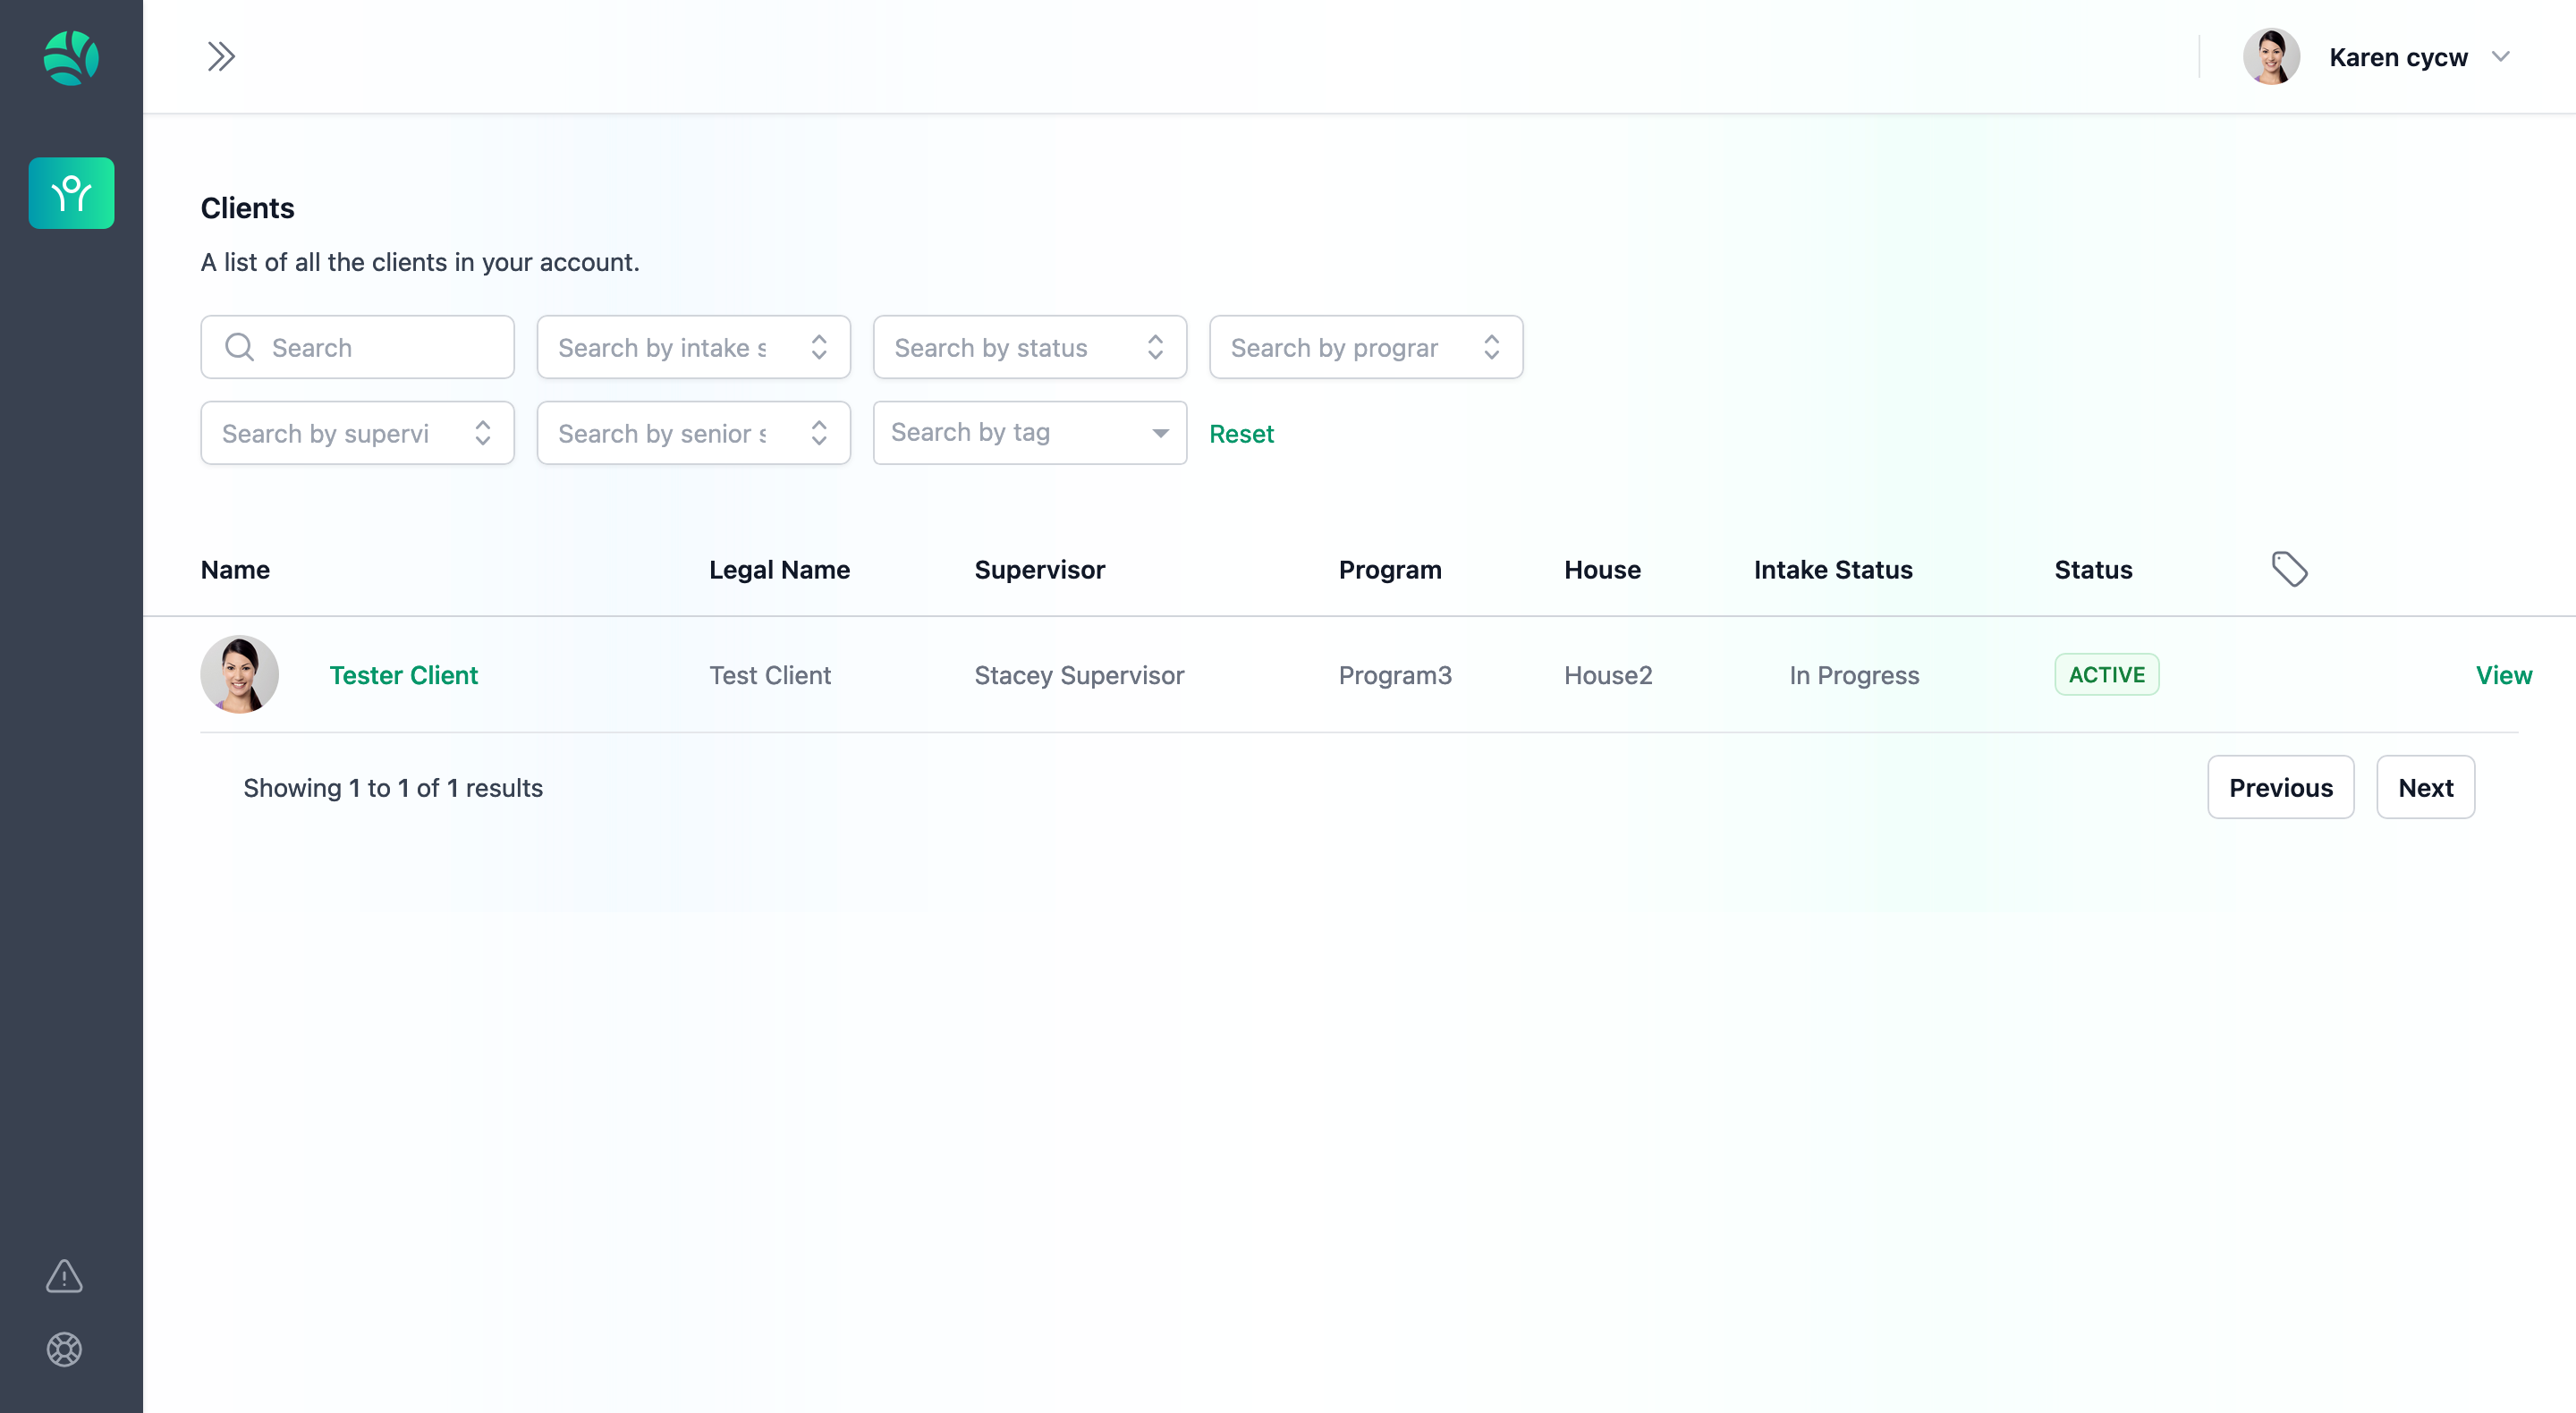
To access a client's profile, simply click on their name in green, or click on the view button located at the far right.
Access Permissions
You will only be able to see clients that you have been assigned as a care provider/caregiver to. You may have access to many clients or none at all. If you need access to a client but don’t have it, please contact an administrative staff member or your direct supervisor to request access.
Client Profiles
Client Profiles contain all the relevant information and documentation pertaining to your client.
From this view, you may also submit Daily Logs, Critical Incidents, Documents, and post Comments.
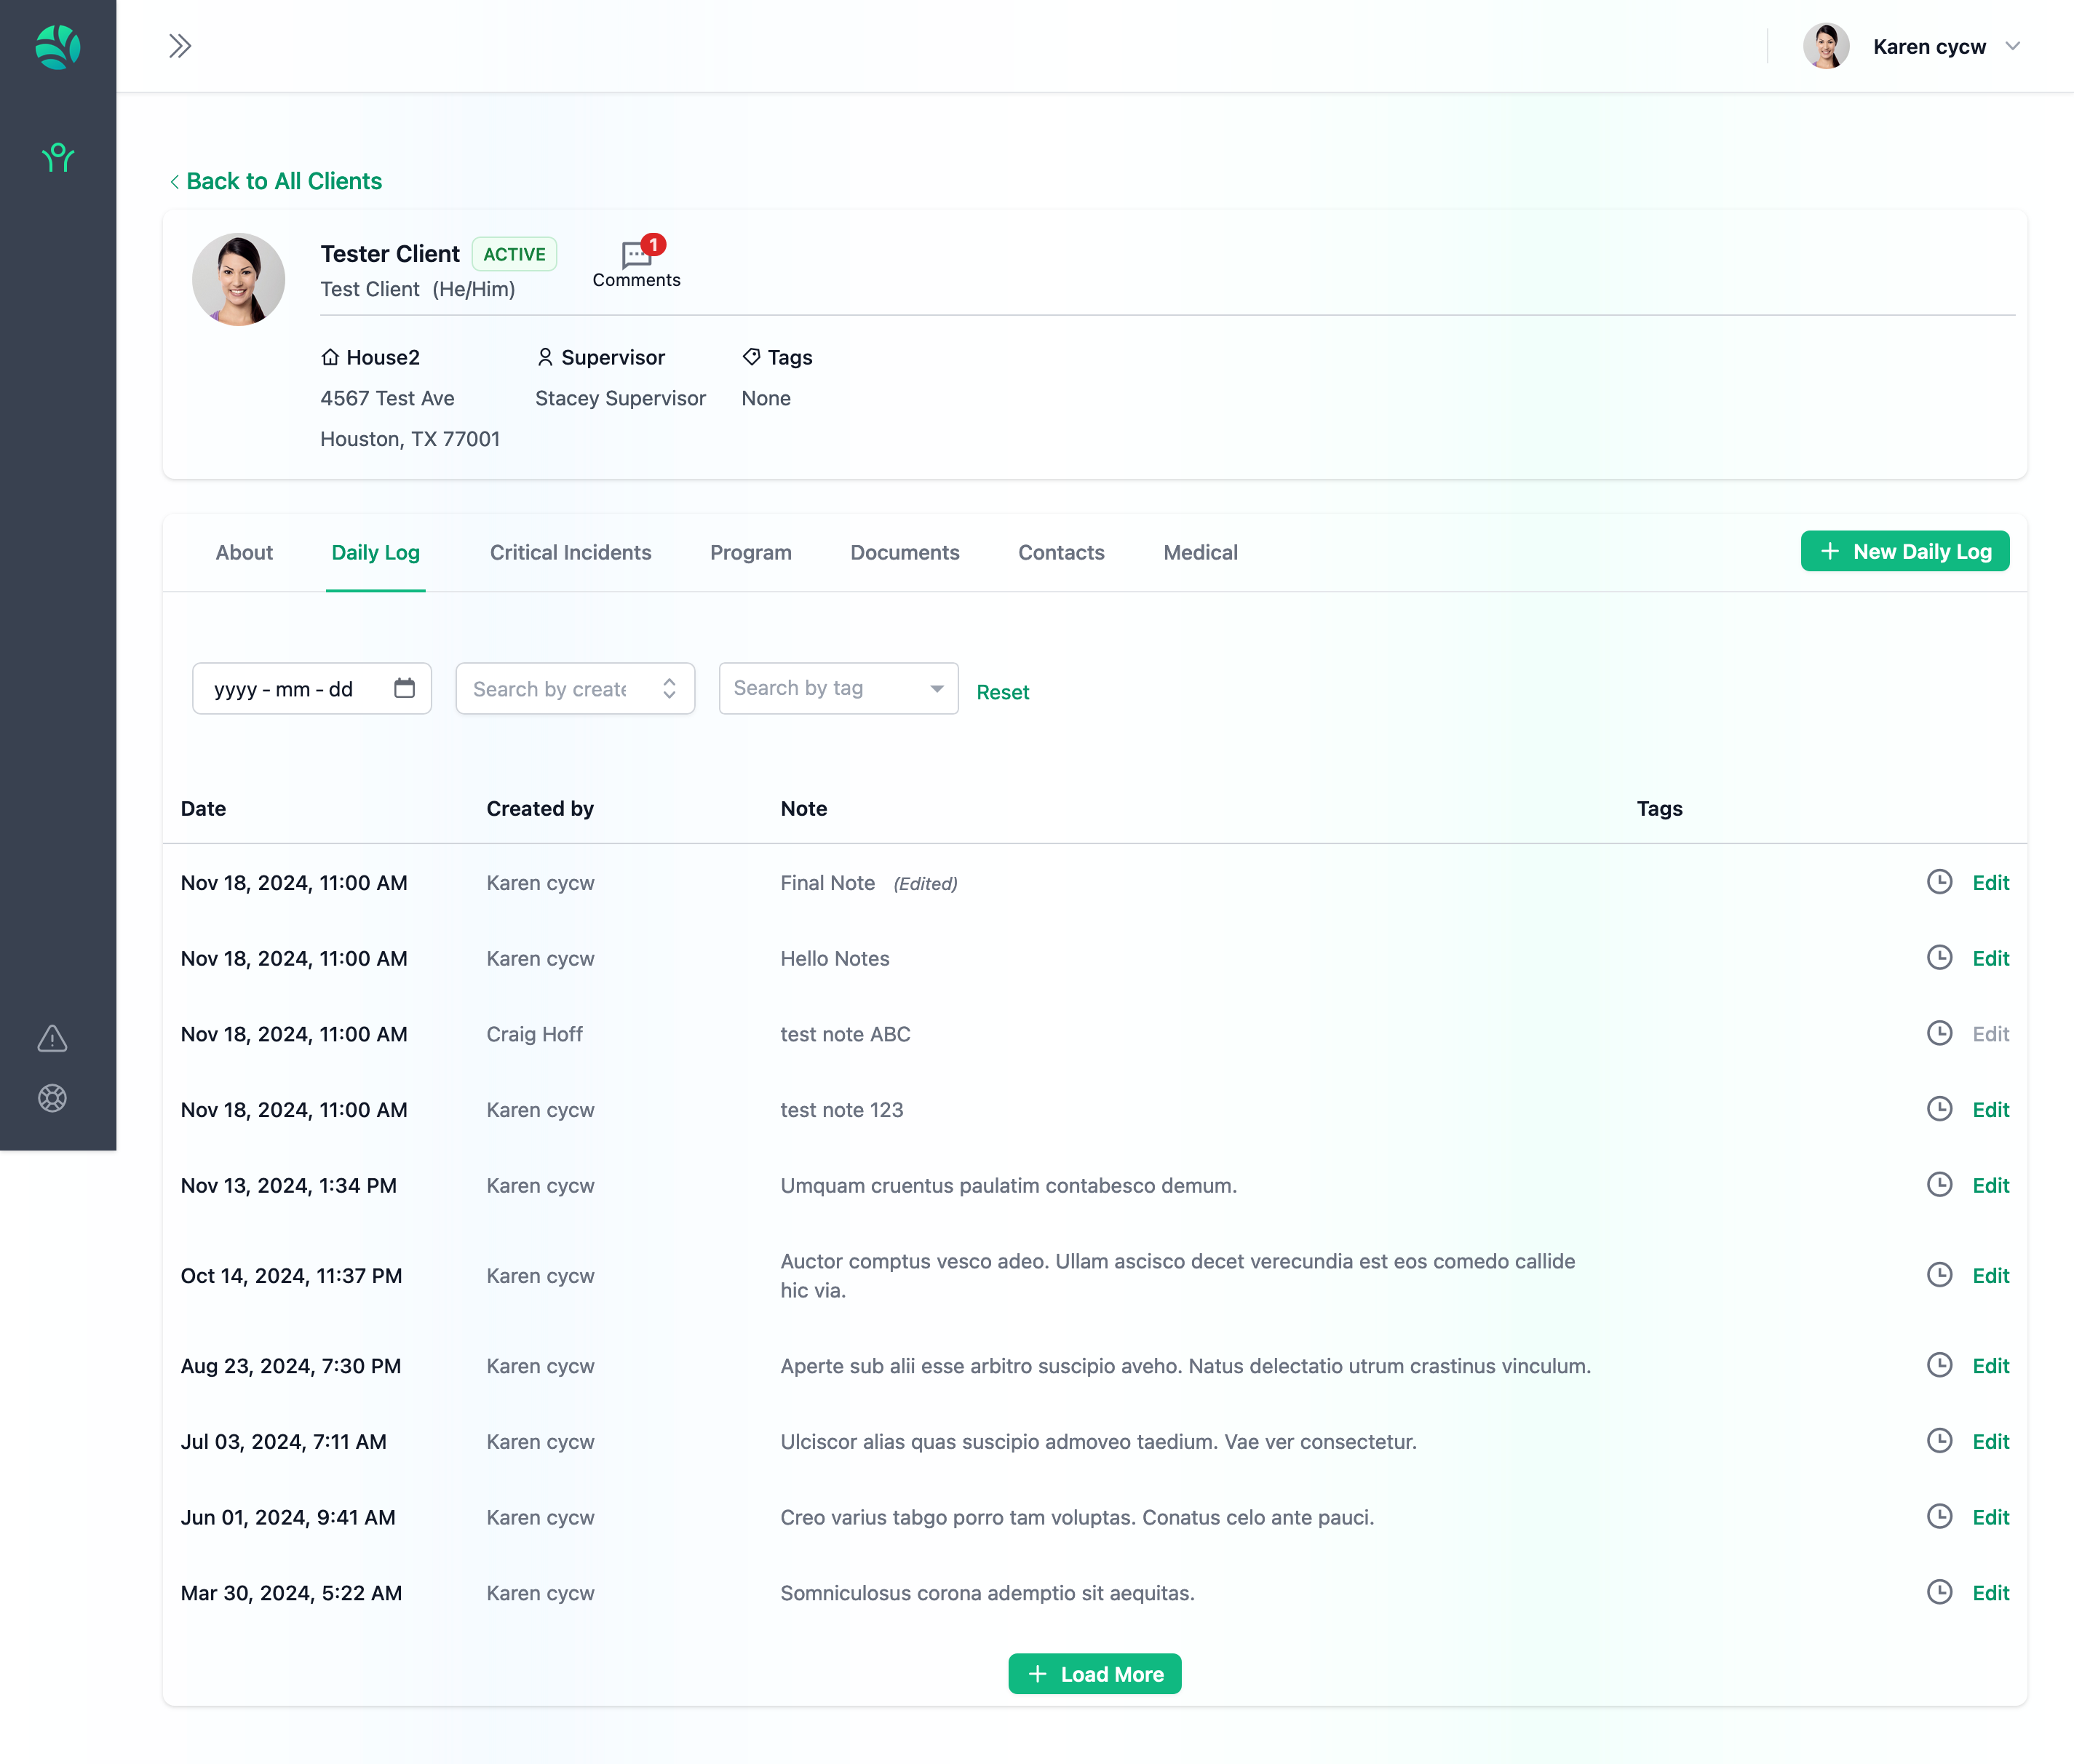
In the Client Header, you can view basic information such as the client’s residence, assigned supervisor, and tags associated with their profile. Additionally, you will have access to their Children’s Services ID Number (if applicable) and Personal Health Number. You can also find intake details, including the expected intake date and the actual intake date.
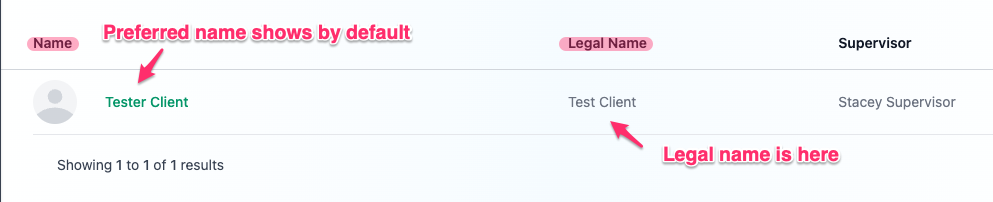
Name & Status
At Nurture, it's important to note that we emphasize the client's chosen name first.
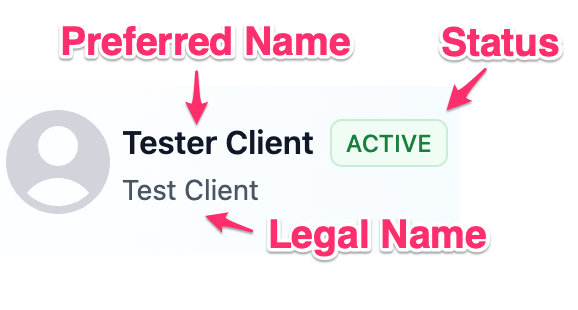
Preferred Name: a Client's Preferred name will take precedence over their legal name on Nurture. In a client profile, the name in bold is the Client's preferred name.
Legal Name: a Client's legal name is the secondary text that appears below their preferred name. This is the name that must and will be used on legal documentation.
Status: A client's status signifies their status with the Agency. By default, only Active clients will display on the page.
You will find the same thing from within the Client List page:
Client Tabs
Tabs in a client's profile contain the features you as a Care Provider will interact with regularly.
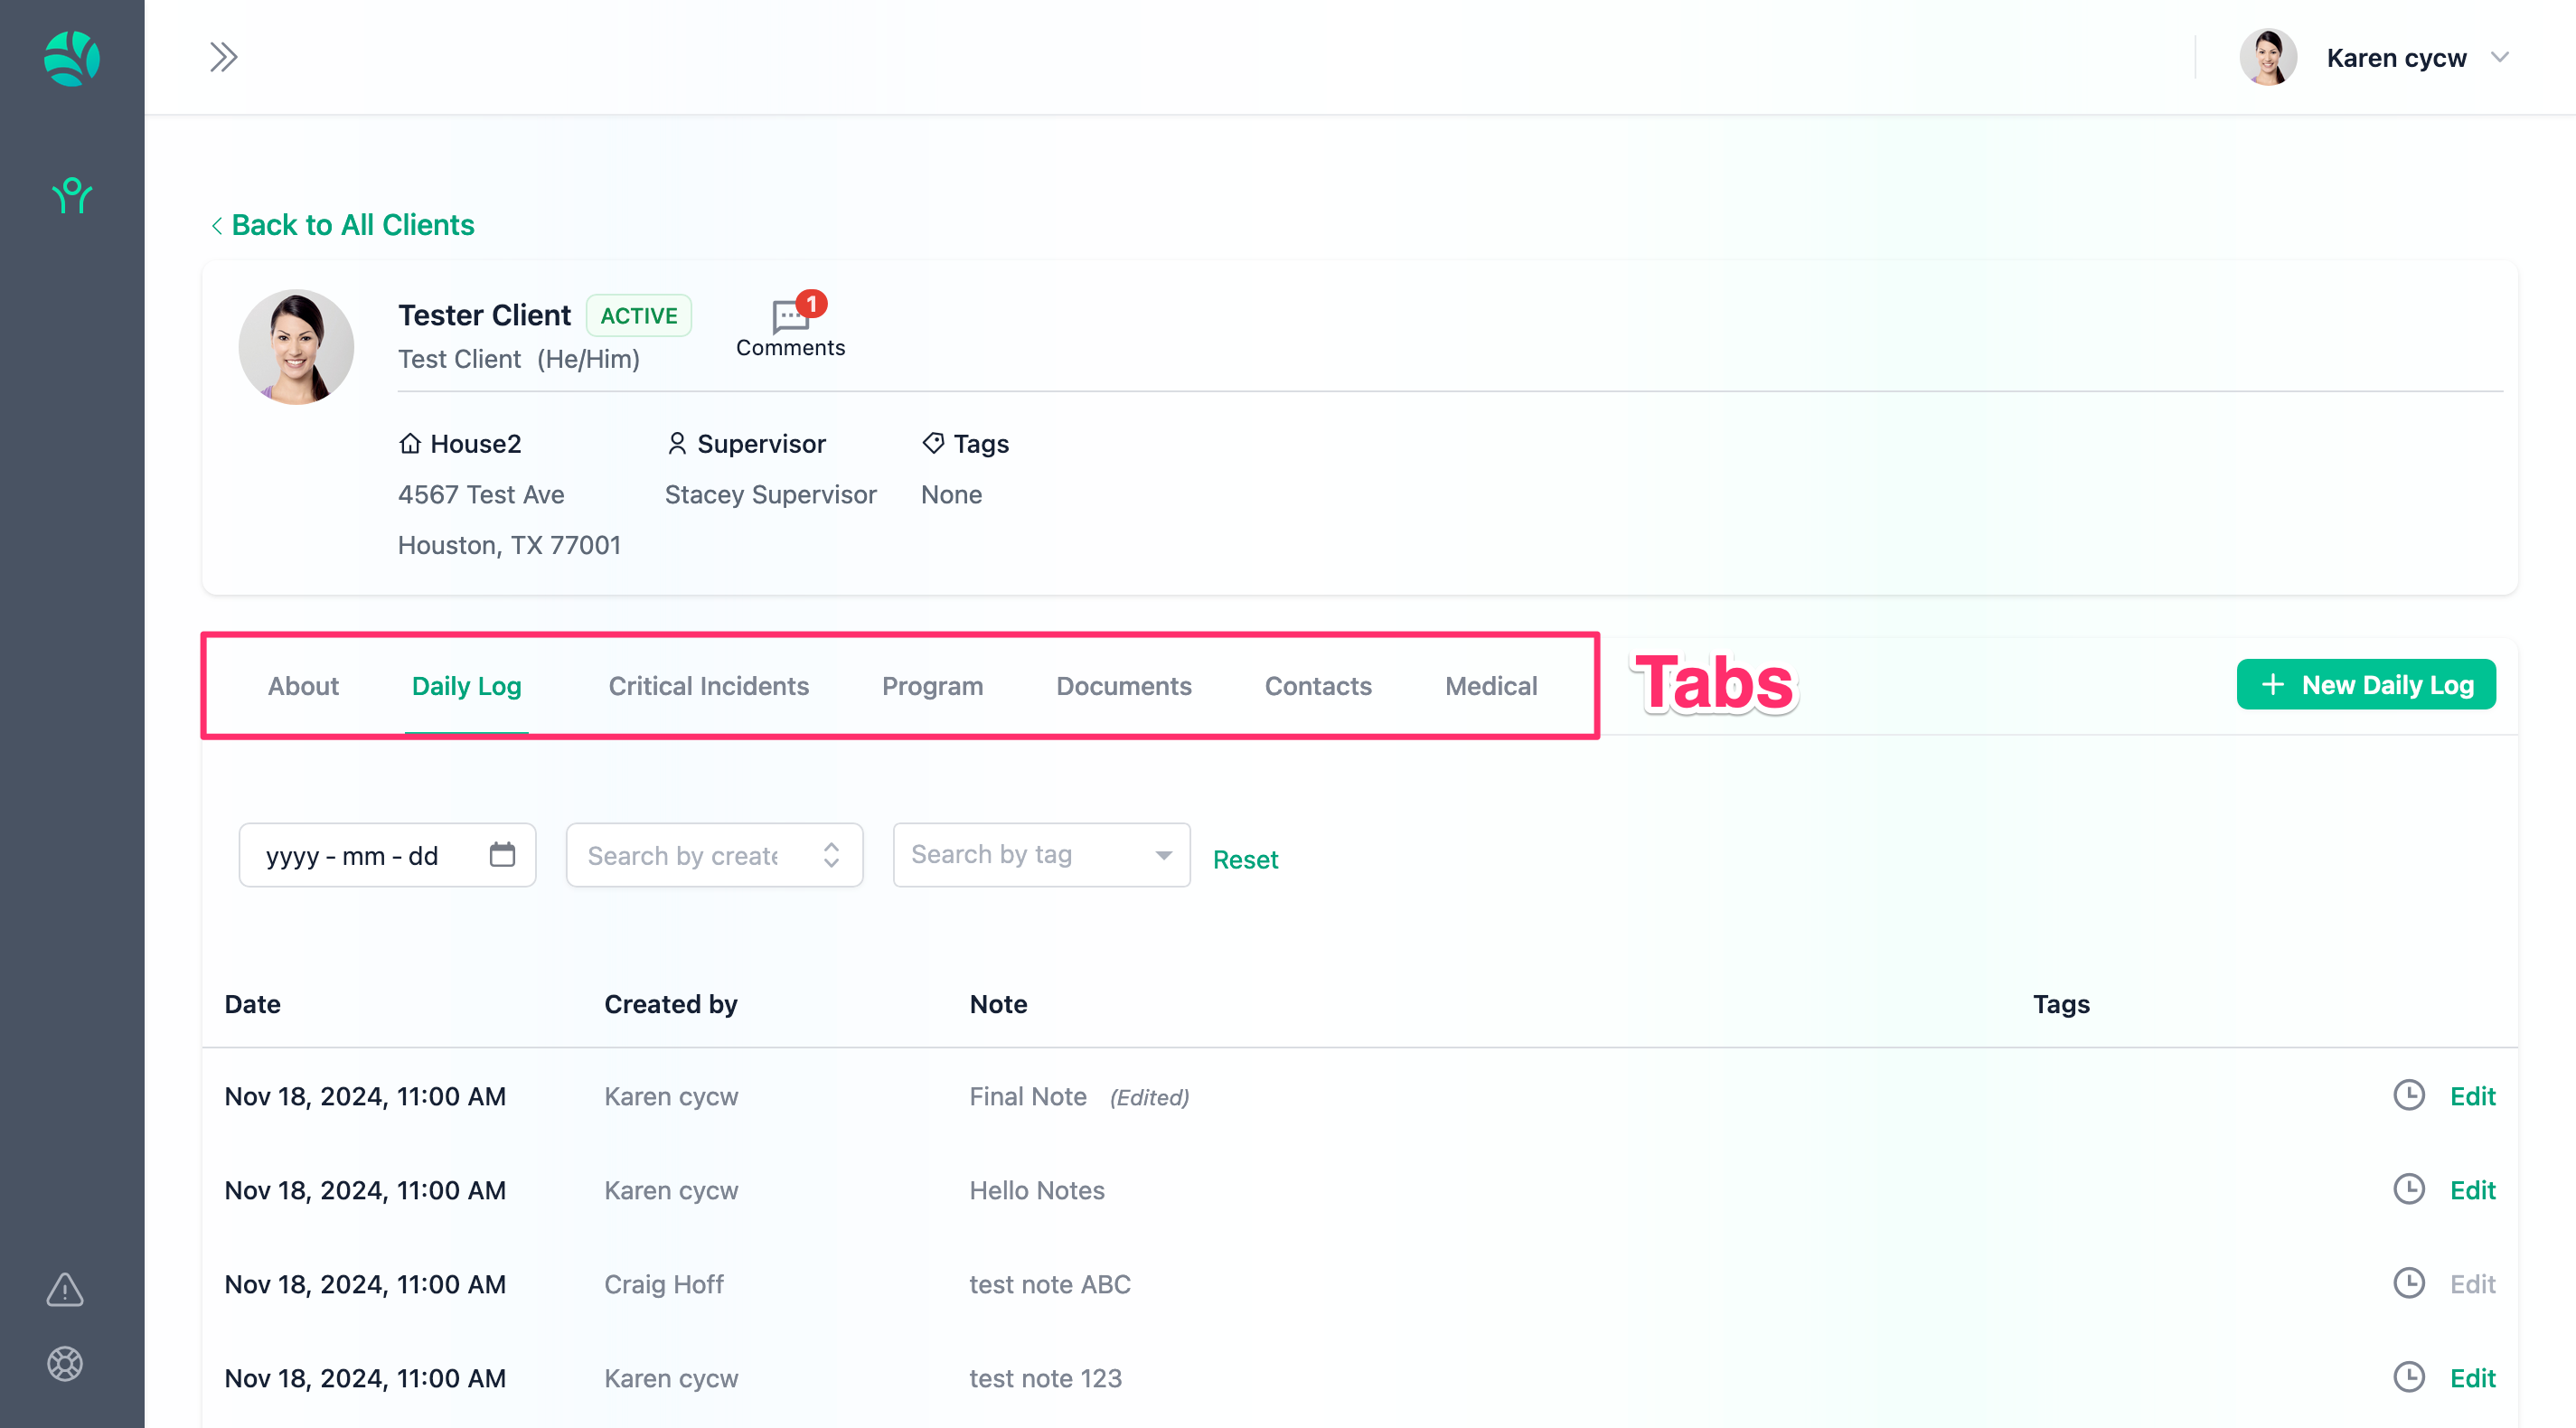
Every client will have the following tabs:
About: To view client information such as their birthday, description, intake information etc.,
Daily Logs: To view and edit the client’s daily log notes. This helps keep track of day-to-day activities and observations.
Critical Incidents: To view, edit, and submit reports on Critical Incidents involving the client, ensuring timely and accurate documentation.
Program: To access all information related to the Client’s Program, including details about the program itself and the staff providing care to the client.
Documents: View important files and documentation relevant to the client, excluding Critical Incident Reports (CIRs) and Daily Logs.
Contacts: View a list of the Client’s approved Contacts, including names, phone numbers, email addresses, and their relationship to the client.
Comments: To start and reply to conversation threads with your team.
Daily Log
Daily logs in Nurture are essential for tracking client interactions and activities.
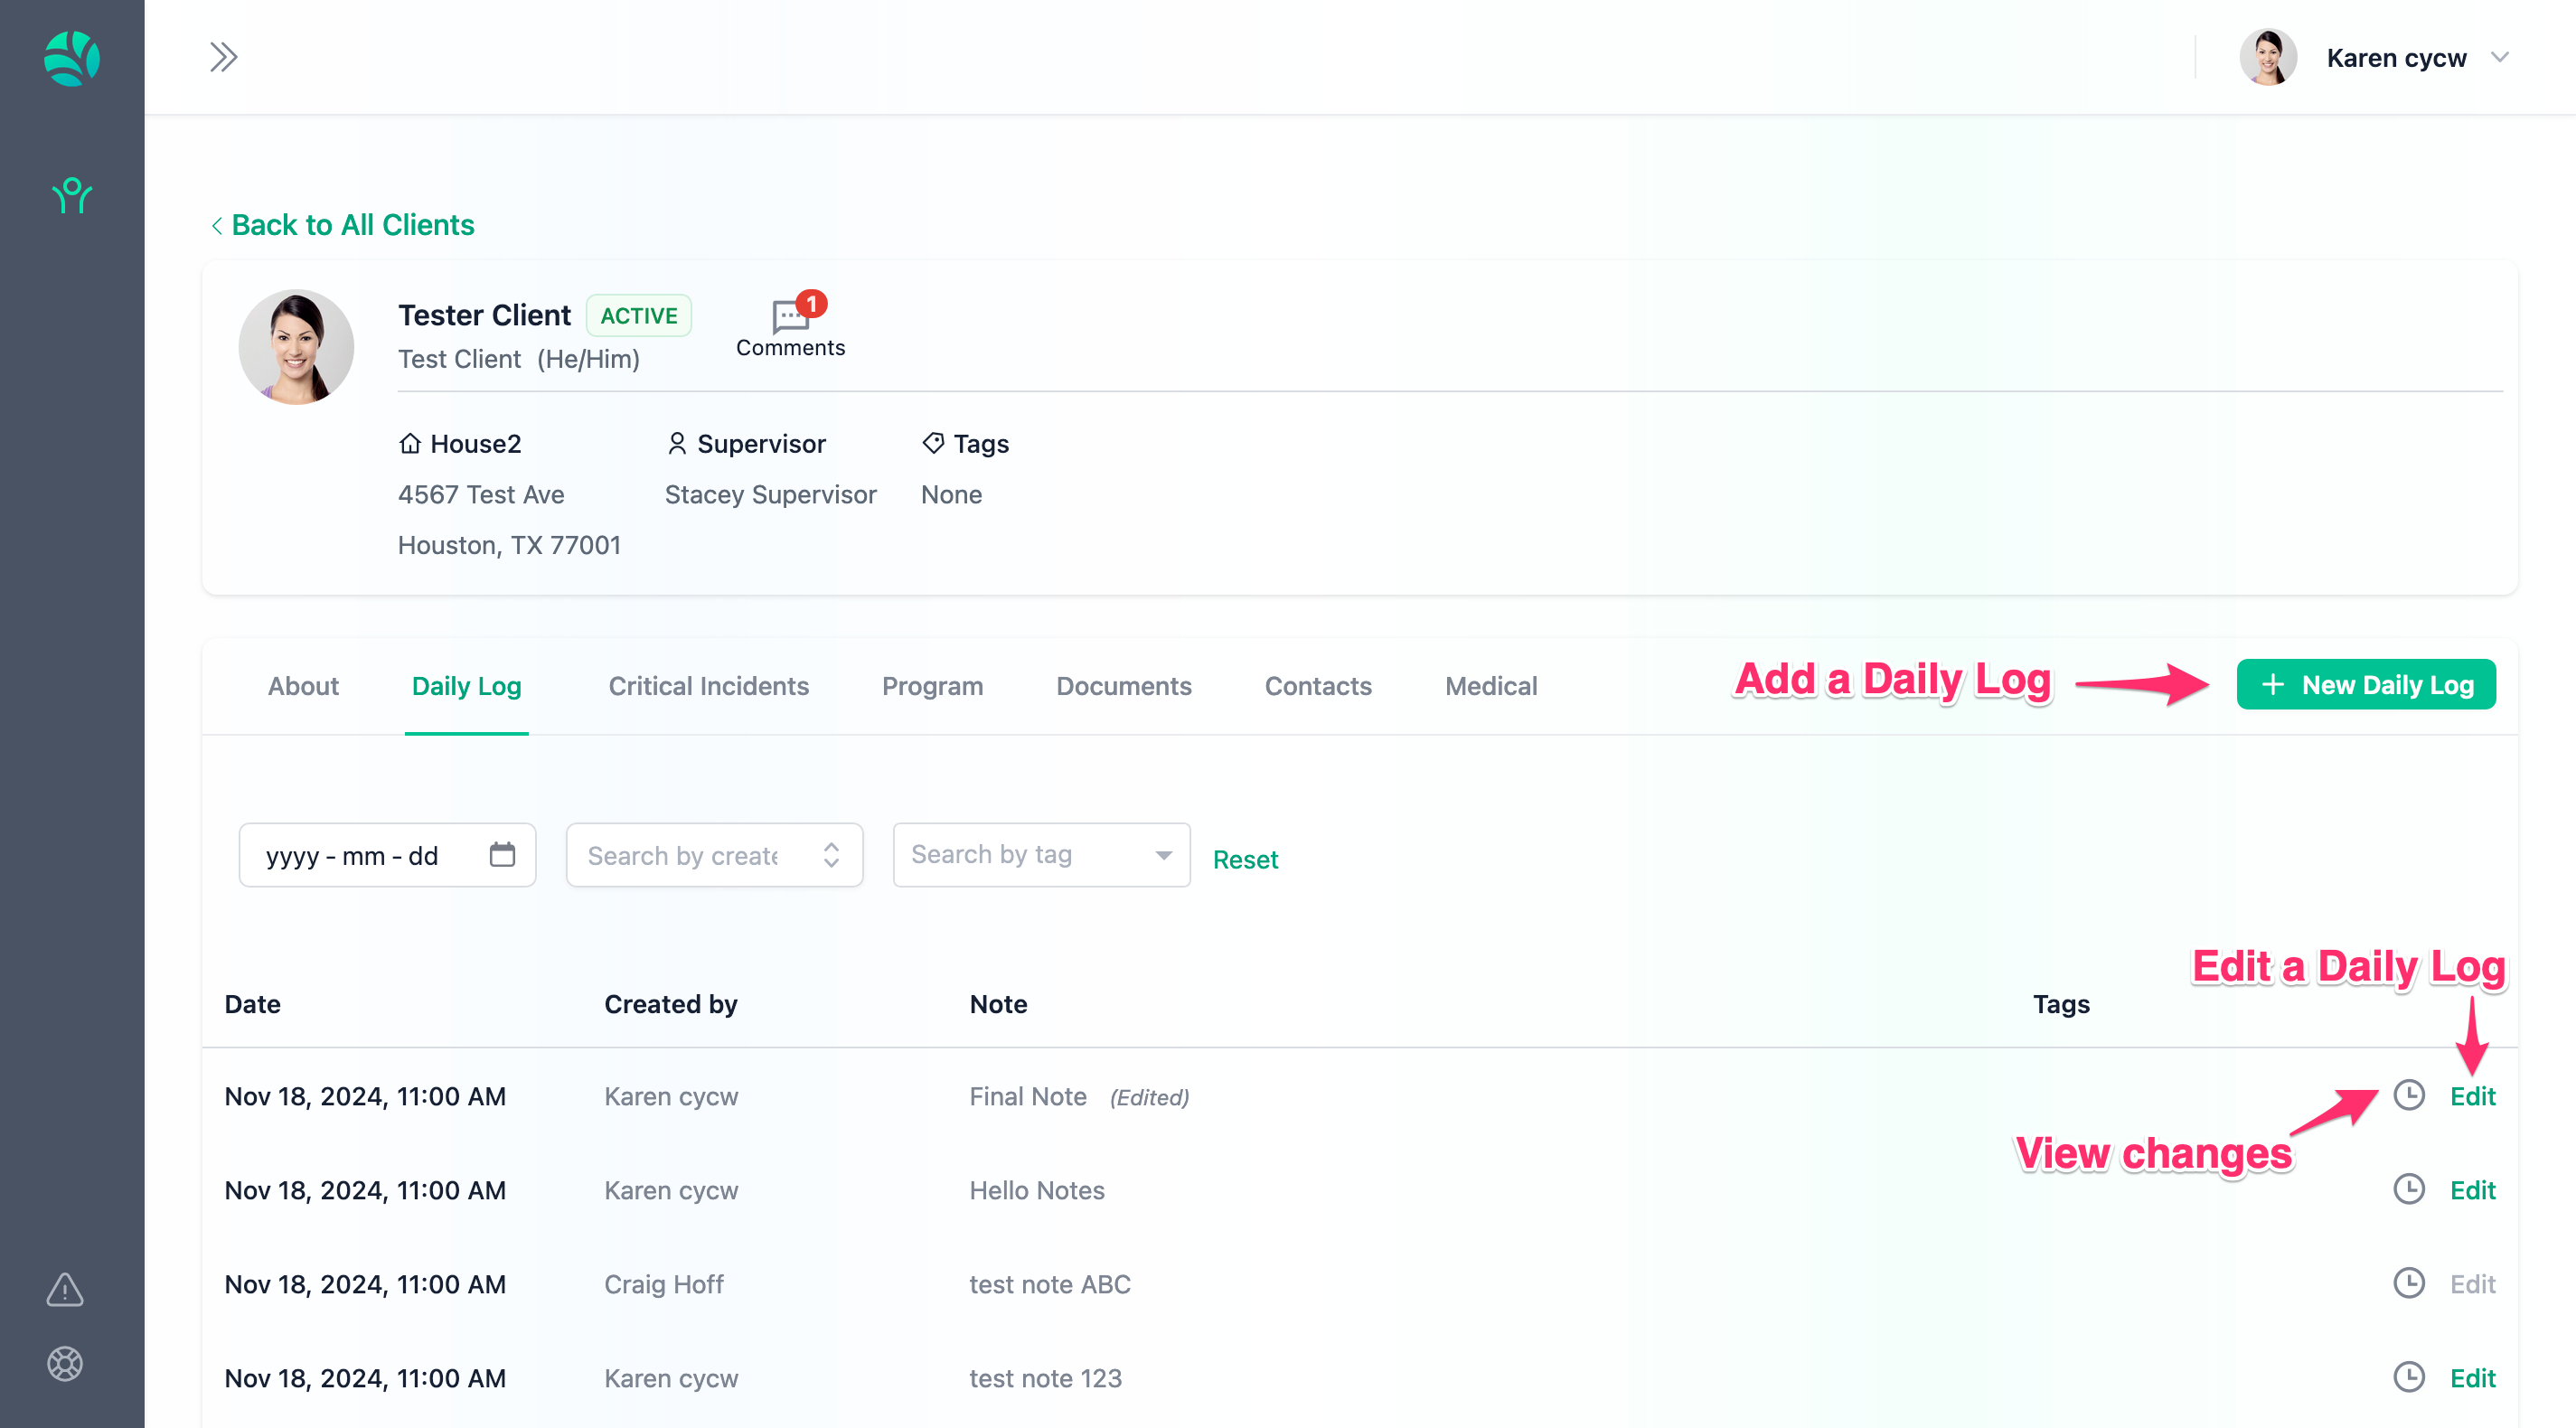
Submitting a Daily Log
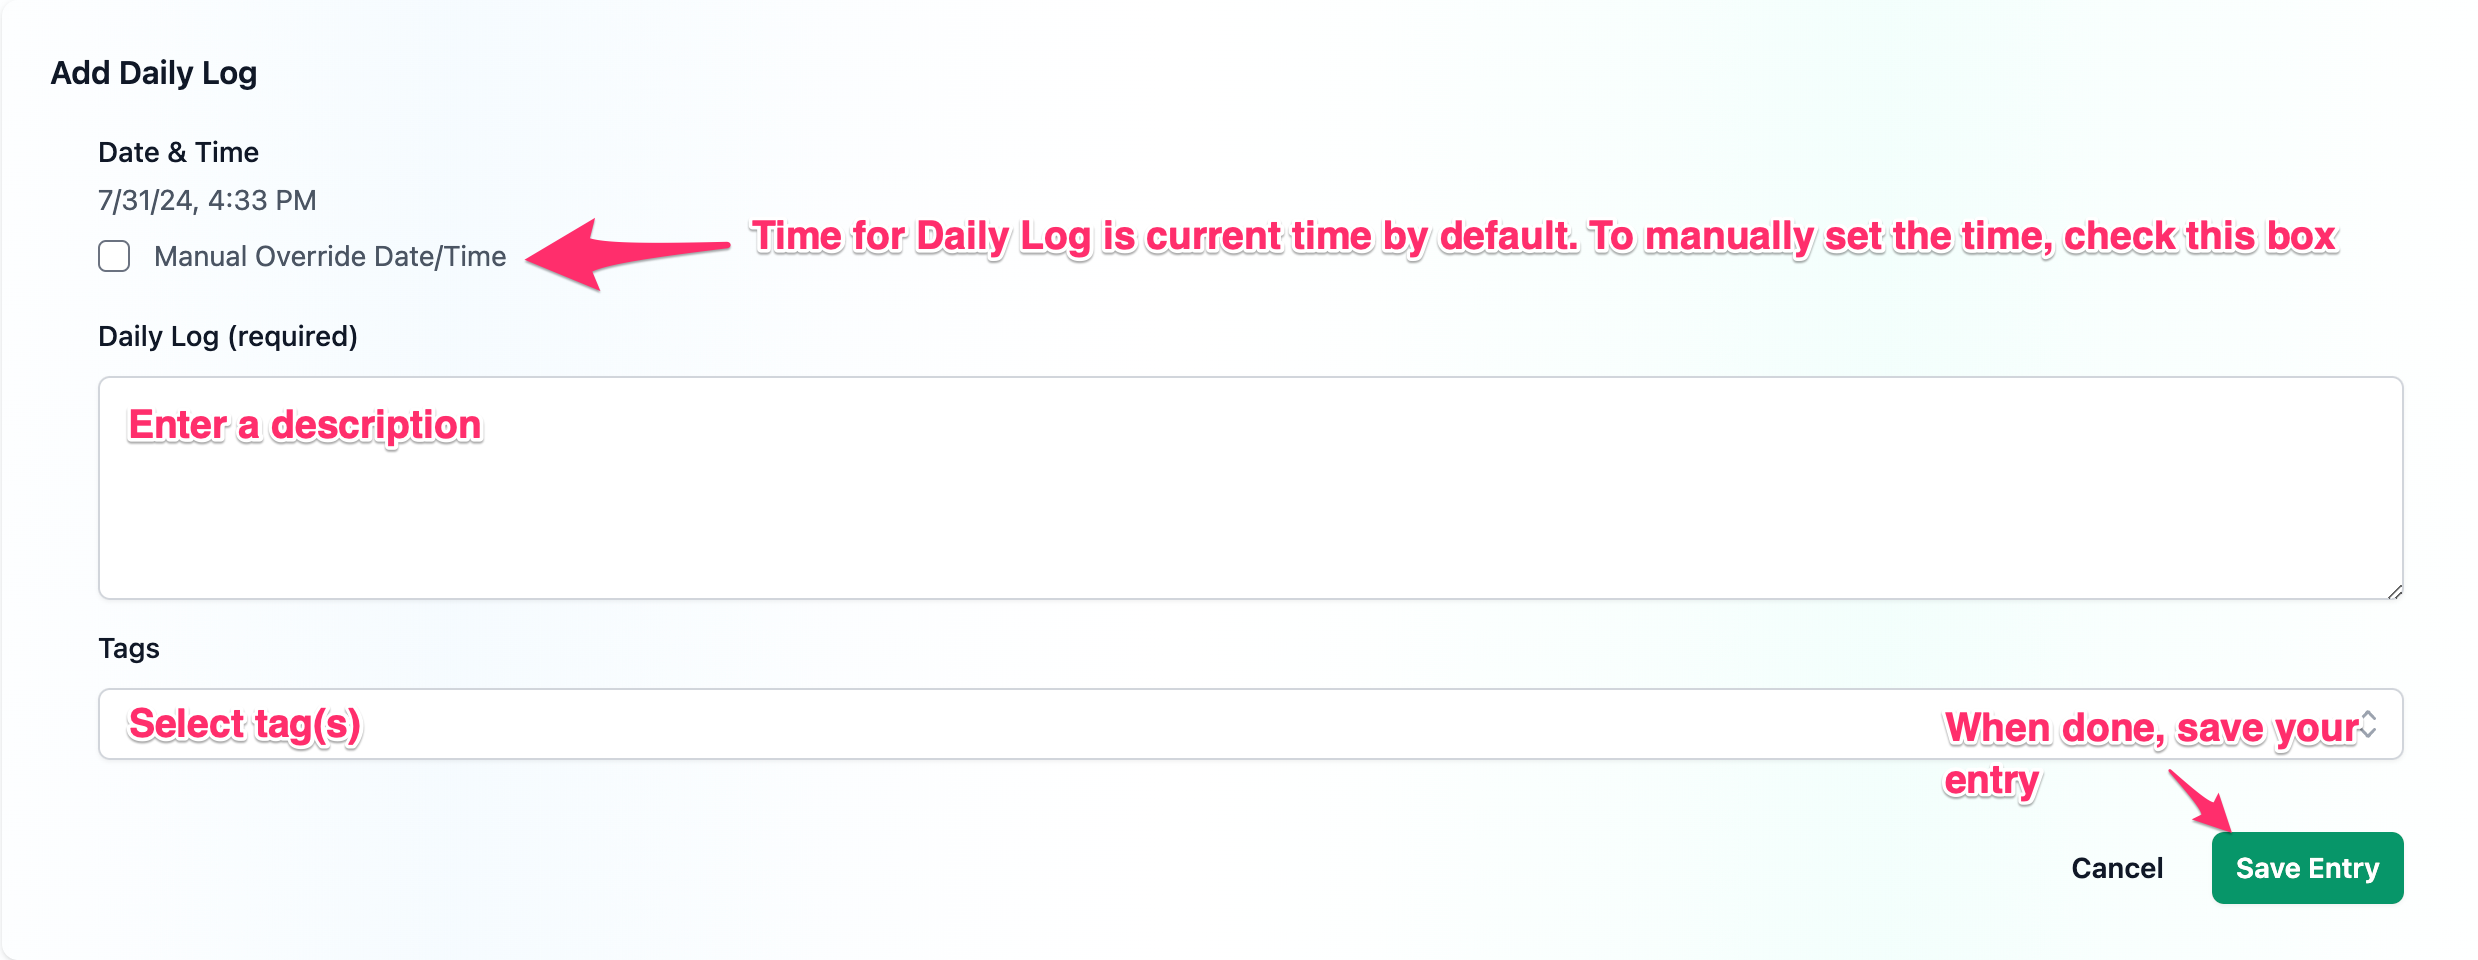
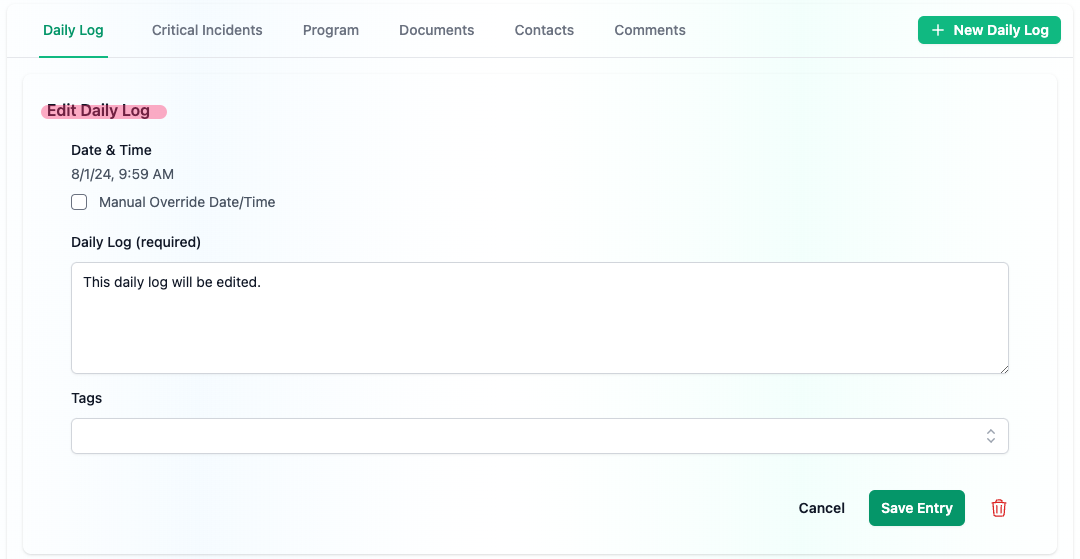
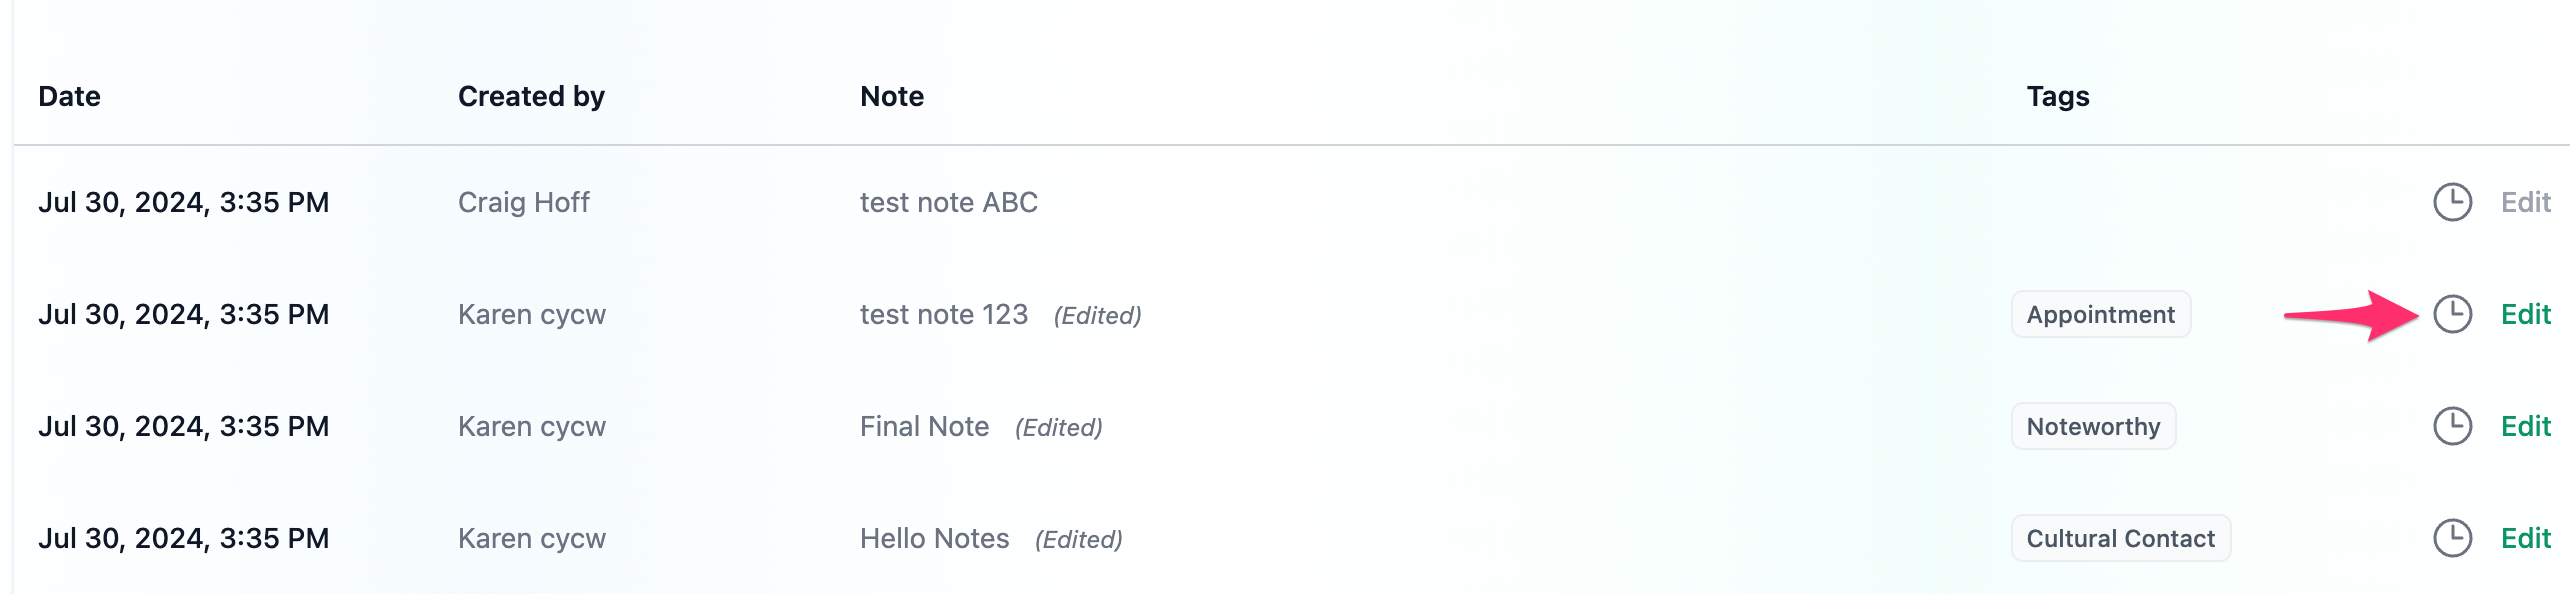
To submit a daily log, navigate to the Daily Log tab of your chosen client and click on the green button to the far right labelled "+ New Daily Log".
Enter all the necessary details, and click "Save Entry" when done.
Access Permissions
As a Care Provider, you can view ALL daily logs of your Client as well as the revisions to those logs. In addition, you can submit your own daily logs and edit them.
However, you cannot edit other daily logs and you also cannot remove daily logs.
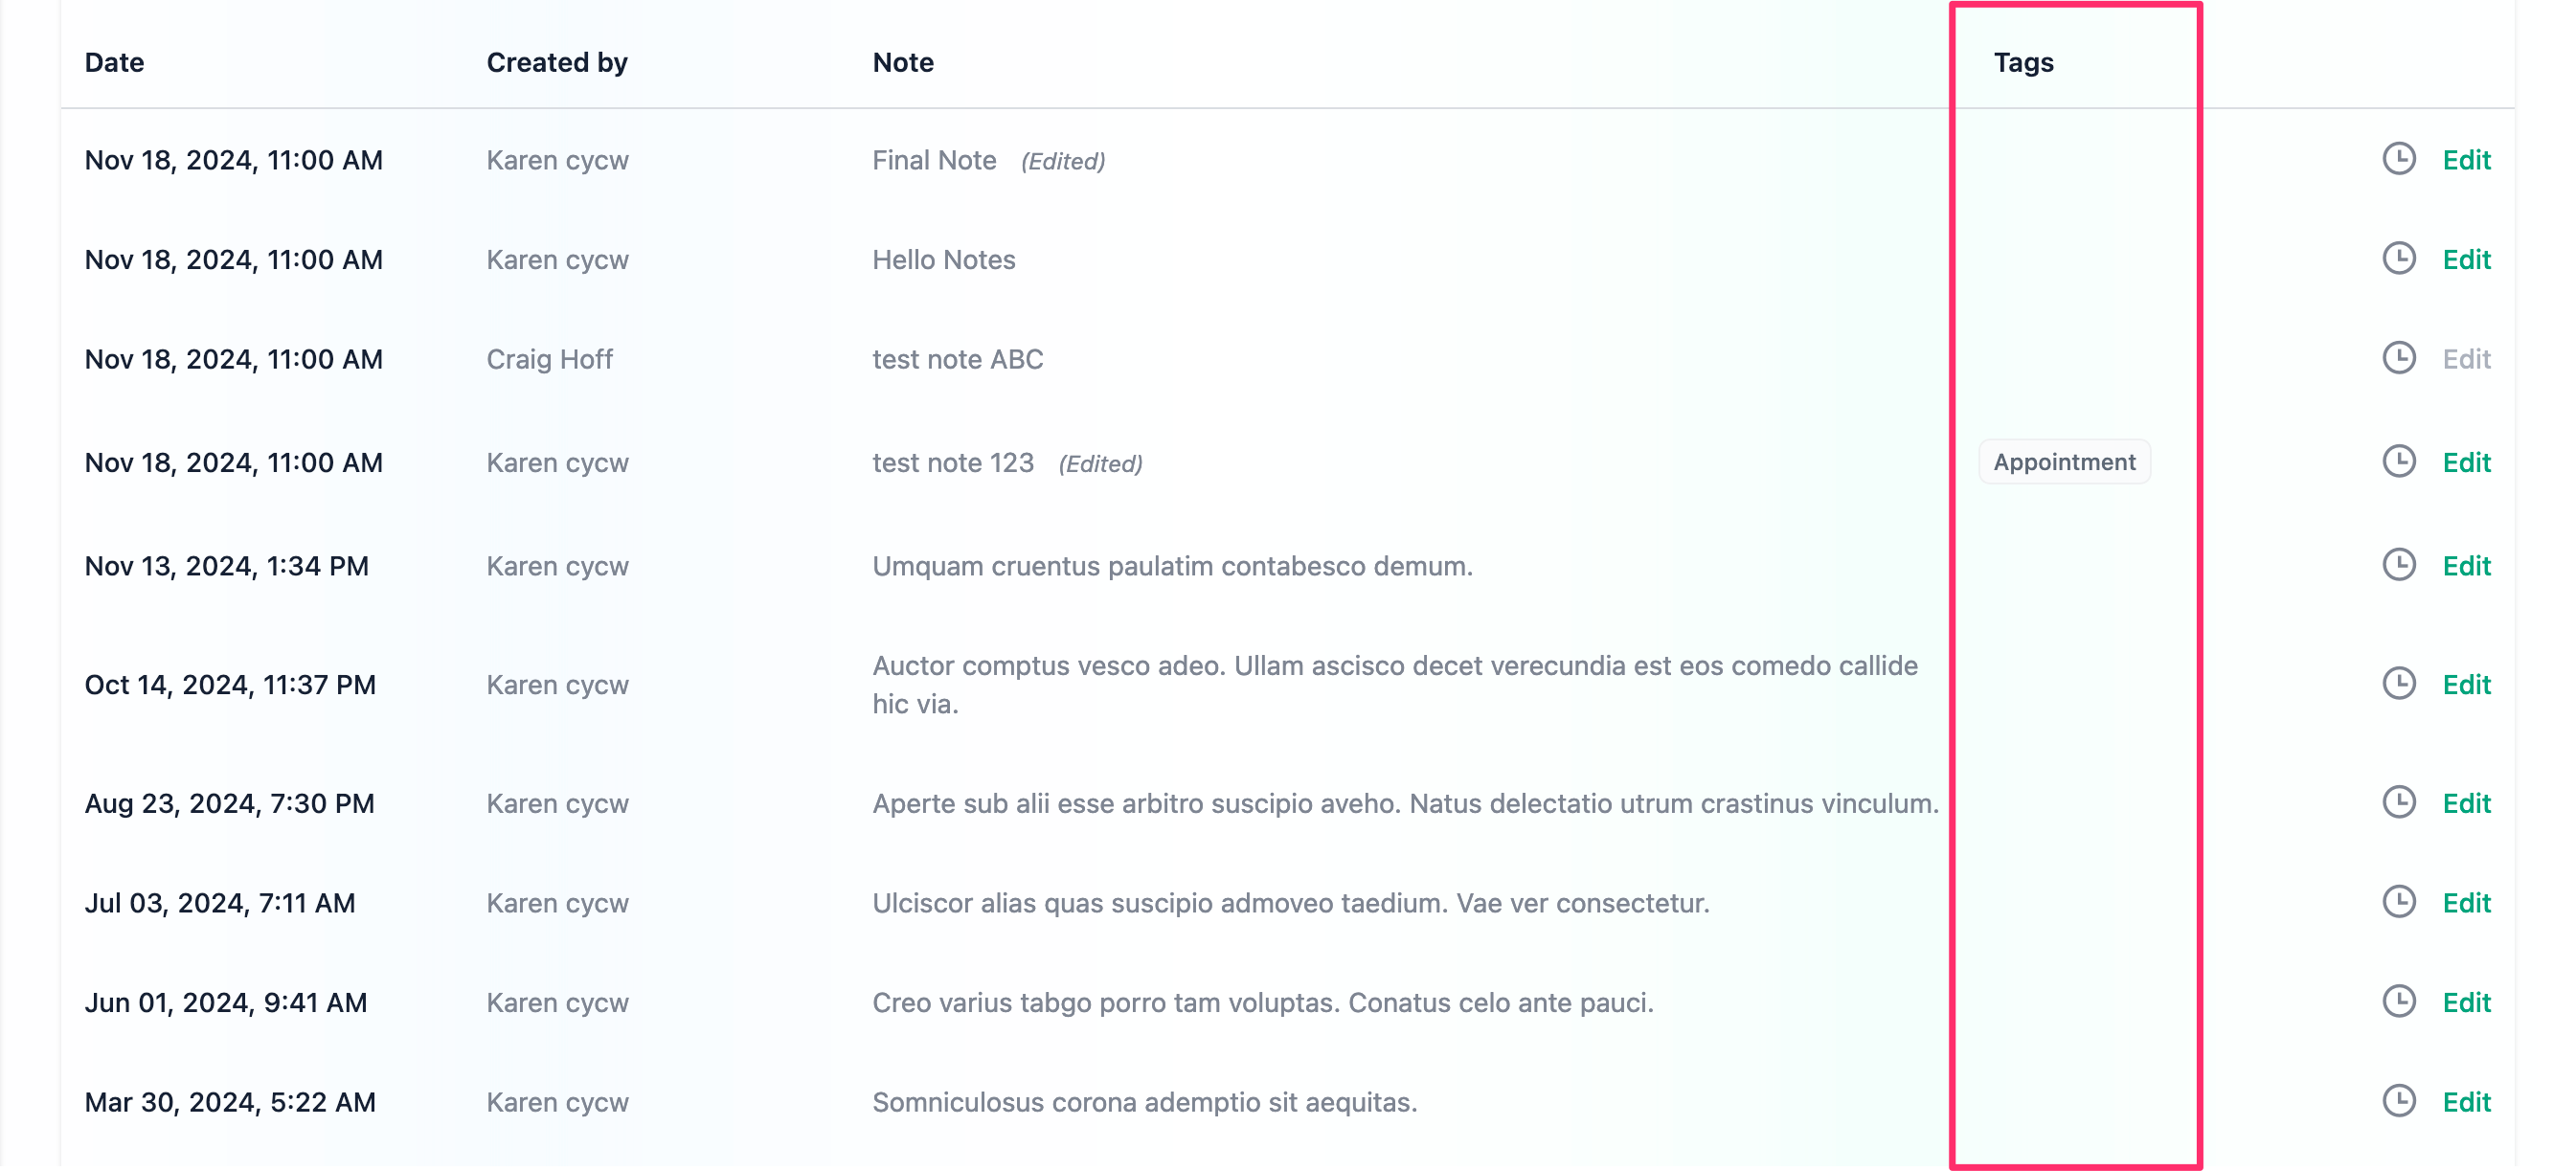
Daily Log Tags
Tags help categorize and streamline documentation, making it easier for caregivers to record relevant information.
Editing a Daily Log
You can edit your Daily Logs even after they have been submitted. If you need to correct a mistake or add more details, follow these steps:
1. Locate the daily log you want to edit.
2. Click on the “Edit” button.
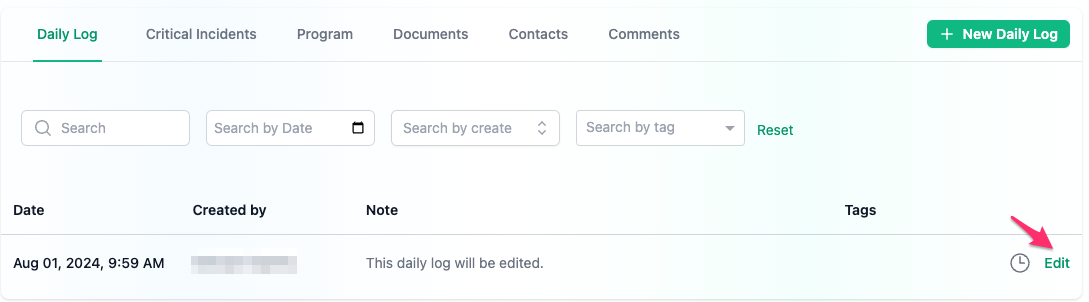
3. Make the necessary changes.
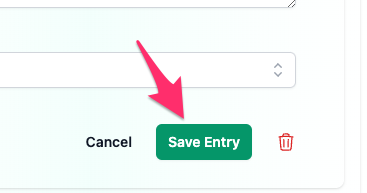
4. Click on "Save Entry"
Please note, you can only edit logs that you have submitted yourself. These logs will be highlighted in green, while edit options for logs submitted by others will be disabled and greyed out.
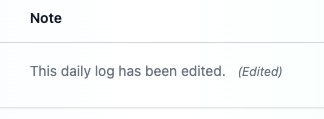
When a Daily Log has been edited, an "(Edited)" stamp will appear at the end of the note.
Daily Log Audits
Daily Log Audits are a timeline of revisions made to a Daily Log after it was first submitted. It outlines what was changed, who changed it, and when it was changed.
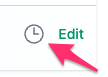
To view revisions, click on the "clock" icon to the far right of the Daily Log. A slide-out with all changes to the log will appear.
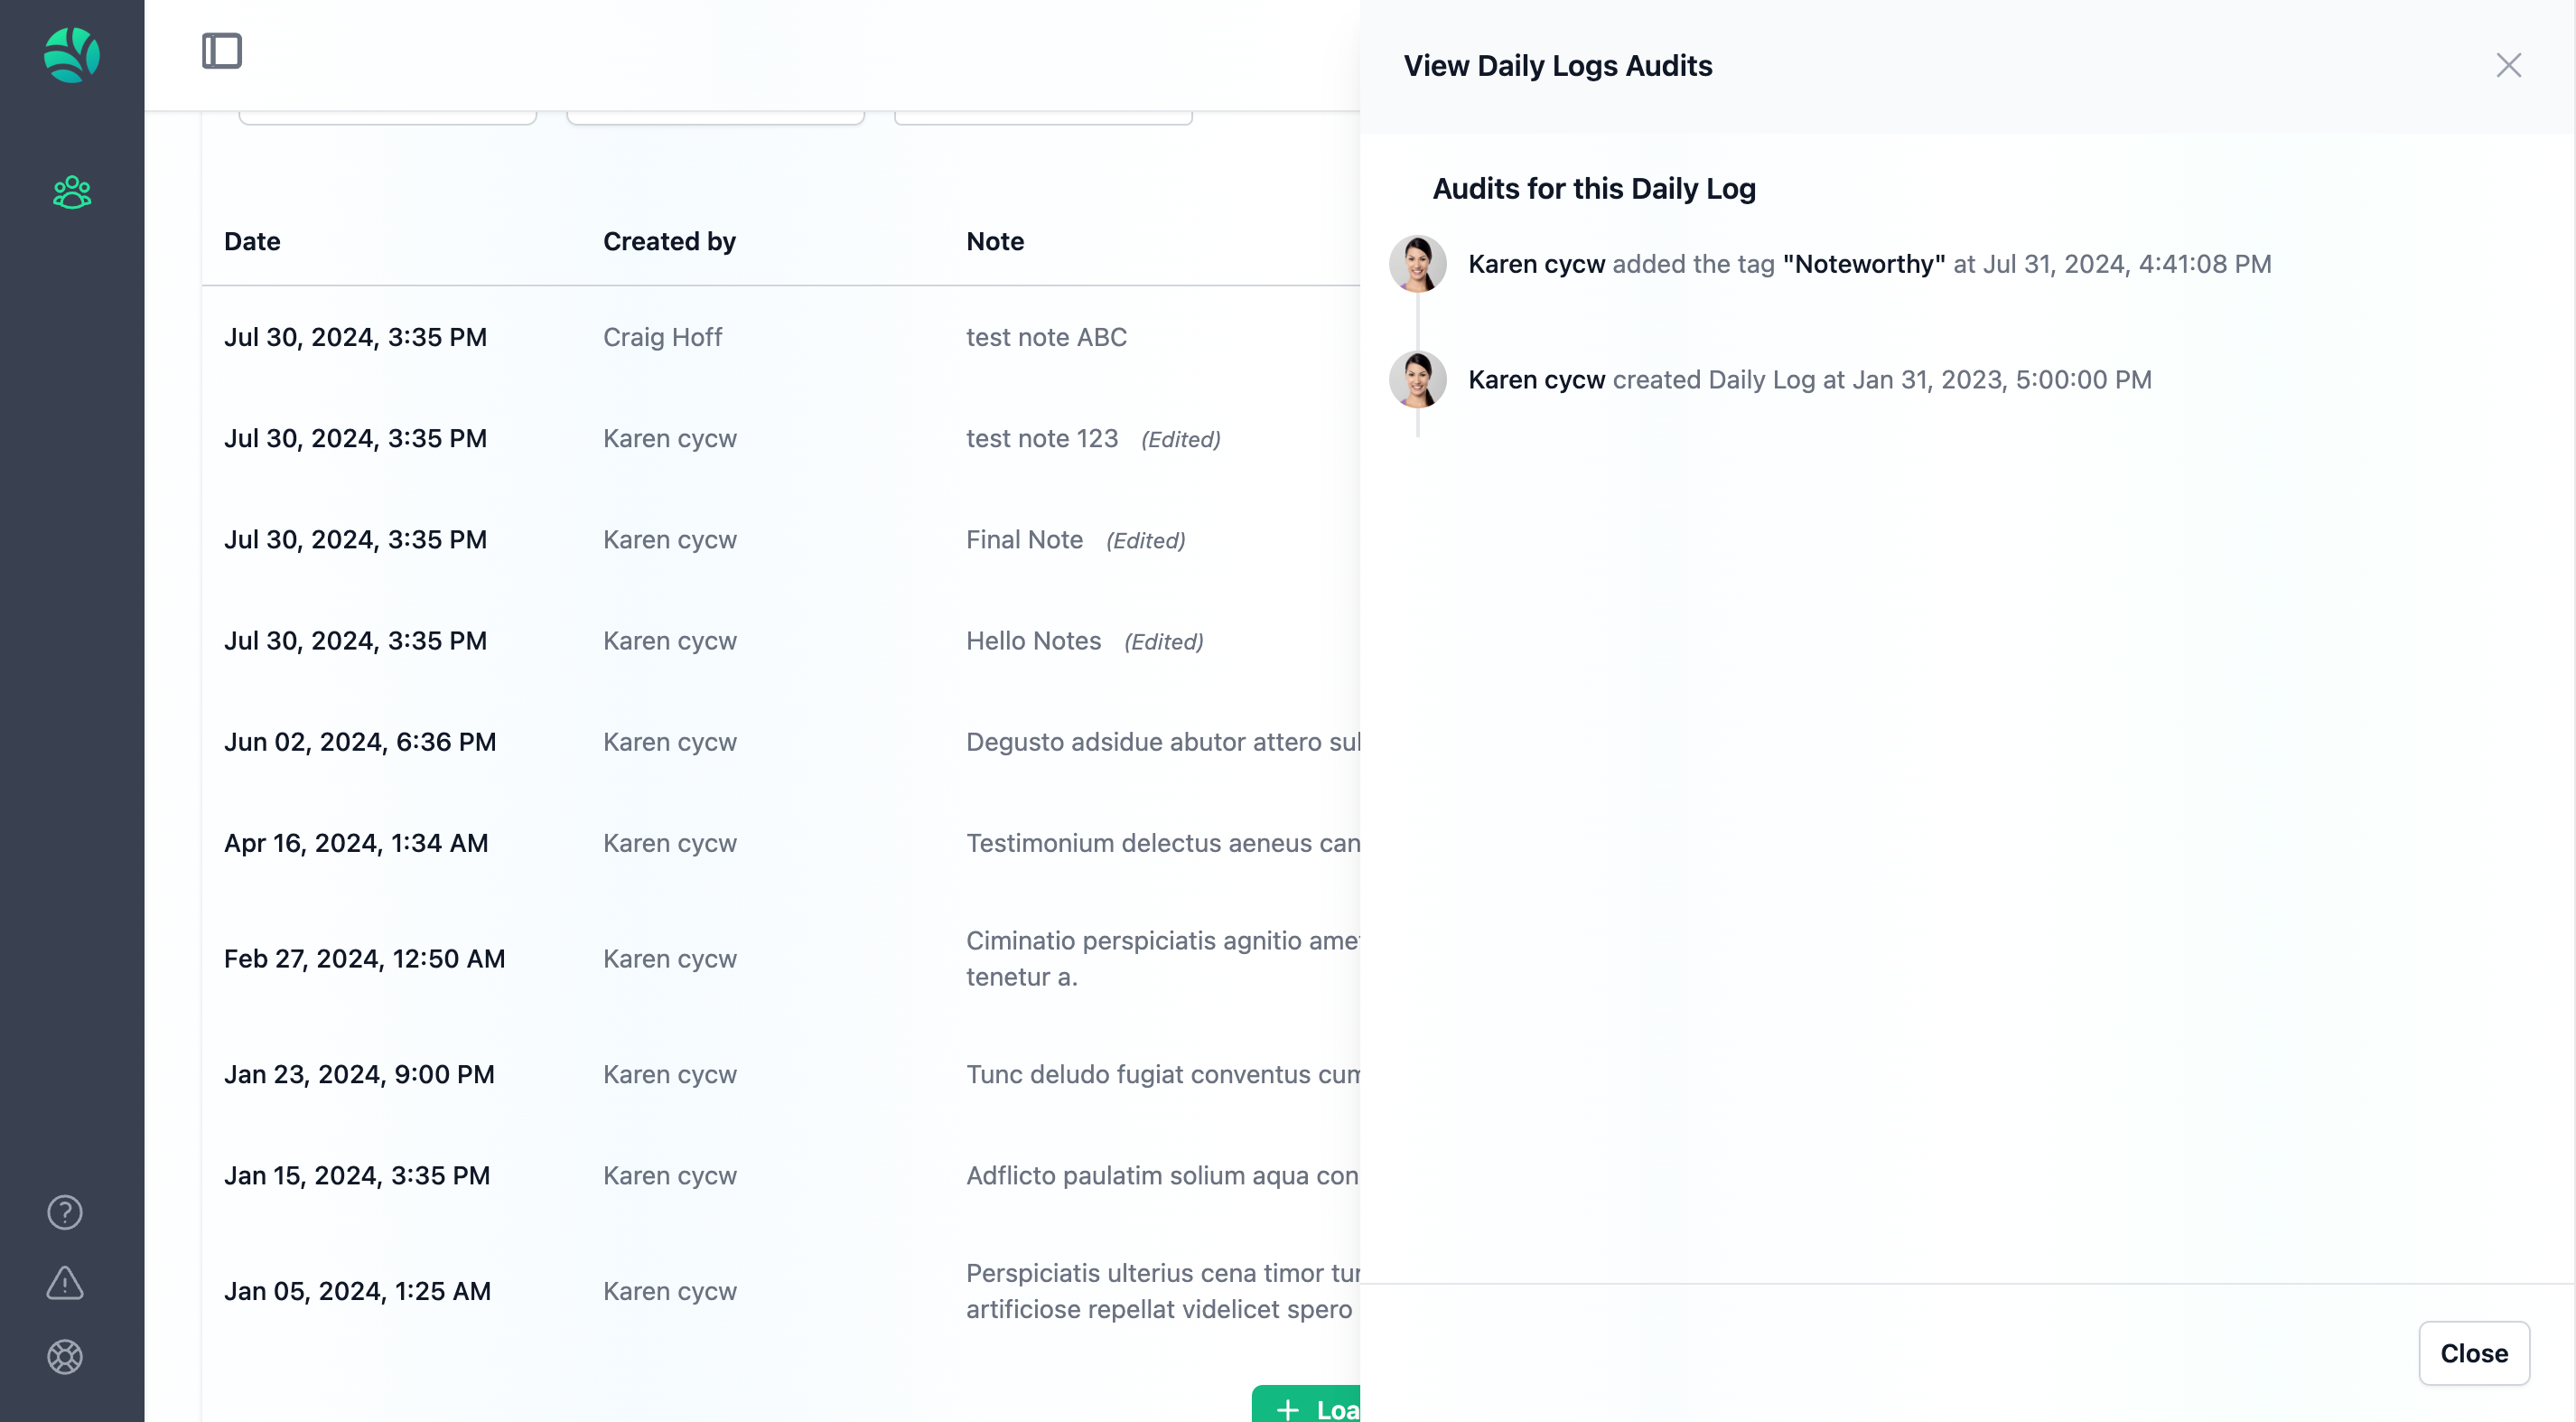
Daily Log Audits will display the most recent changes at the top.
Critical Incidents
The Critical Incidents tab is a repository of all Critical Incident Reports reported on Nurture for a client.
Critical Incidents have 5 chronological statuses:
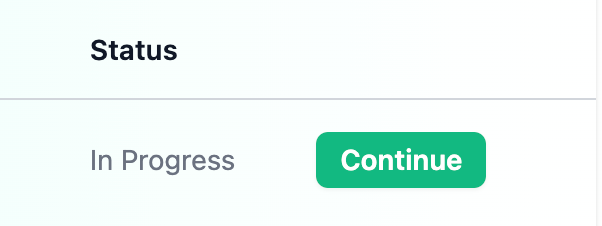
In-Progress: This status is a when a report has been started but not yet completed.
Draft: This status is a when a CIR has been successfully reported and is ready for review by an admin staff (typically a Program Supervisor).
Under Review: This status signifies that an admin staff (typically a Program Supervisor) has begun reviewing the CIR.
Reviewed: This status means a CIR has been successfully reviewed and is ready for a final pass from a manager or senior supervisor to be submitted to stakeholders.
Submitted: This status indicates the CIR has been submitted to stakeholders (like Children's Services).
Creating a New Critical Incident
To report a new Critical Incident, do the following:
Navigate to your client's profile.
Select the Critical Incidents Tab.
Click on "+ New CIR" (Green button).
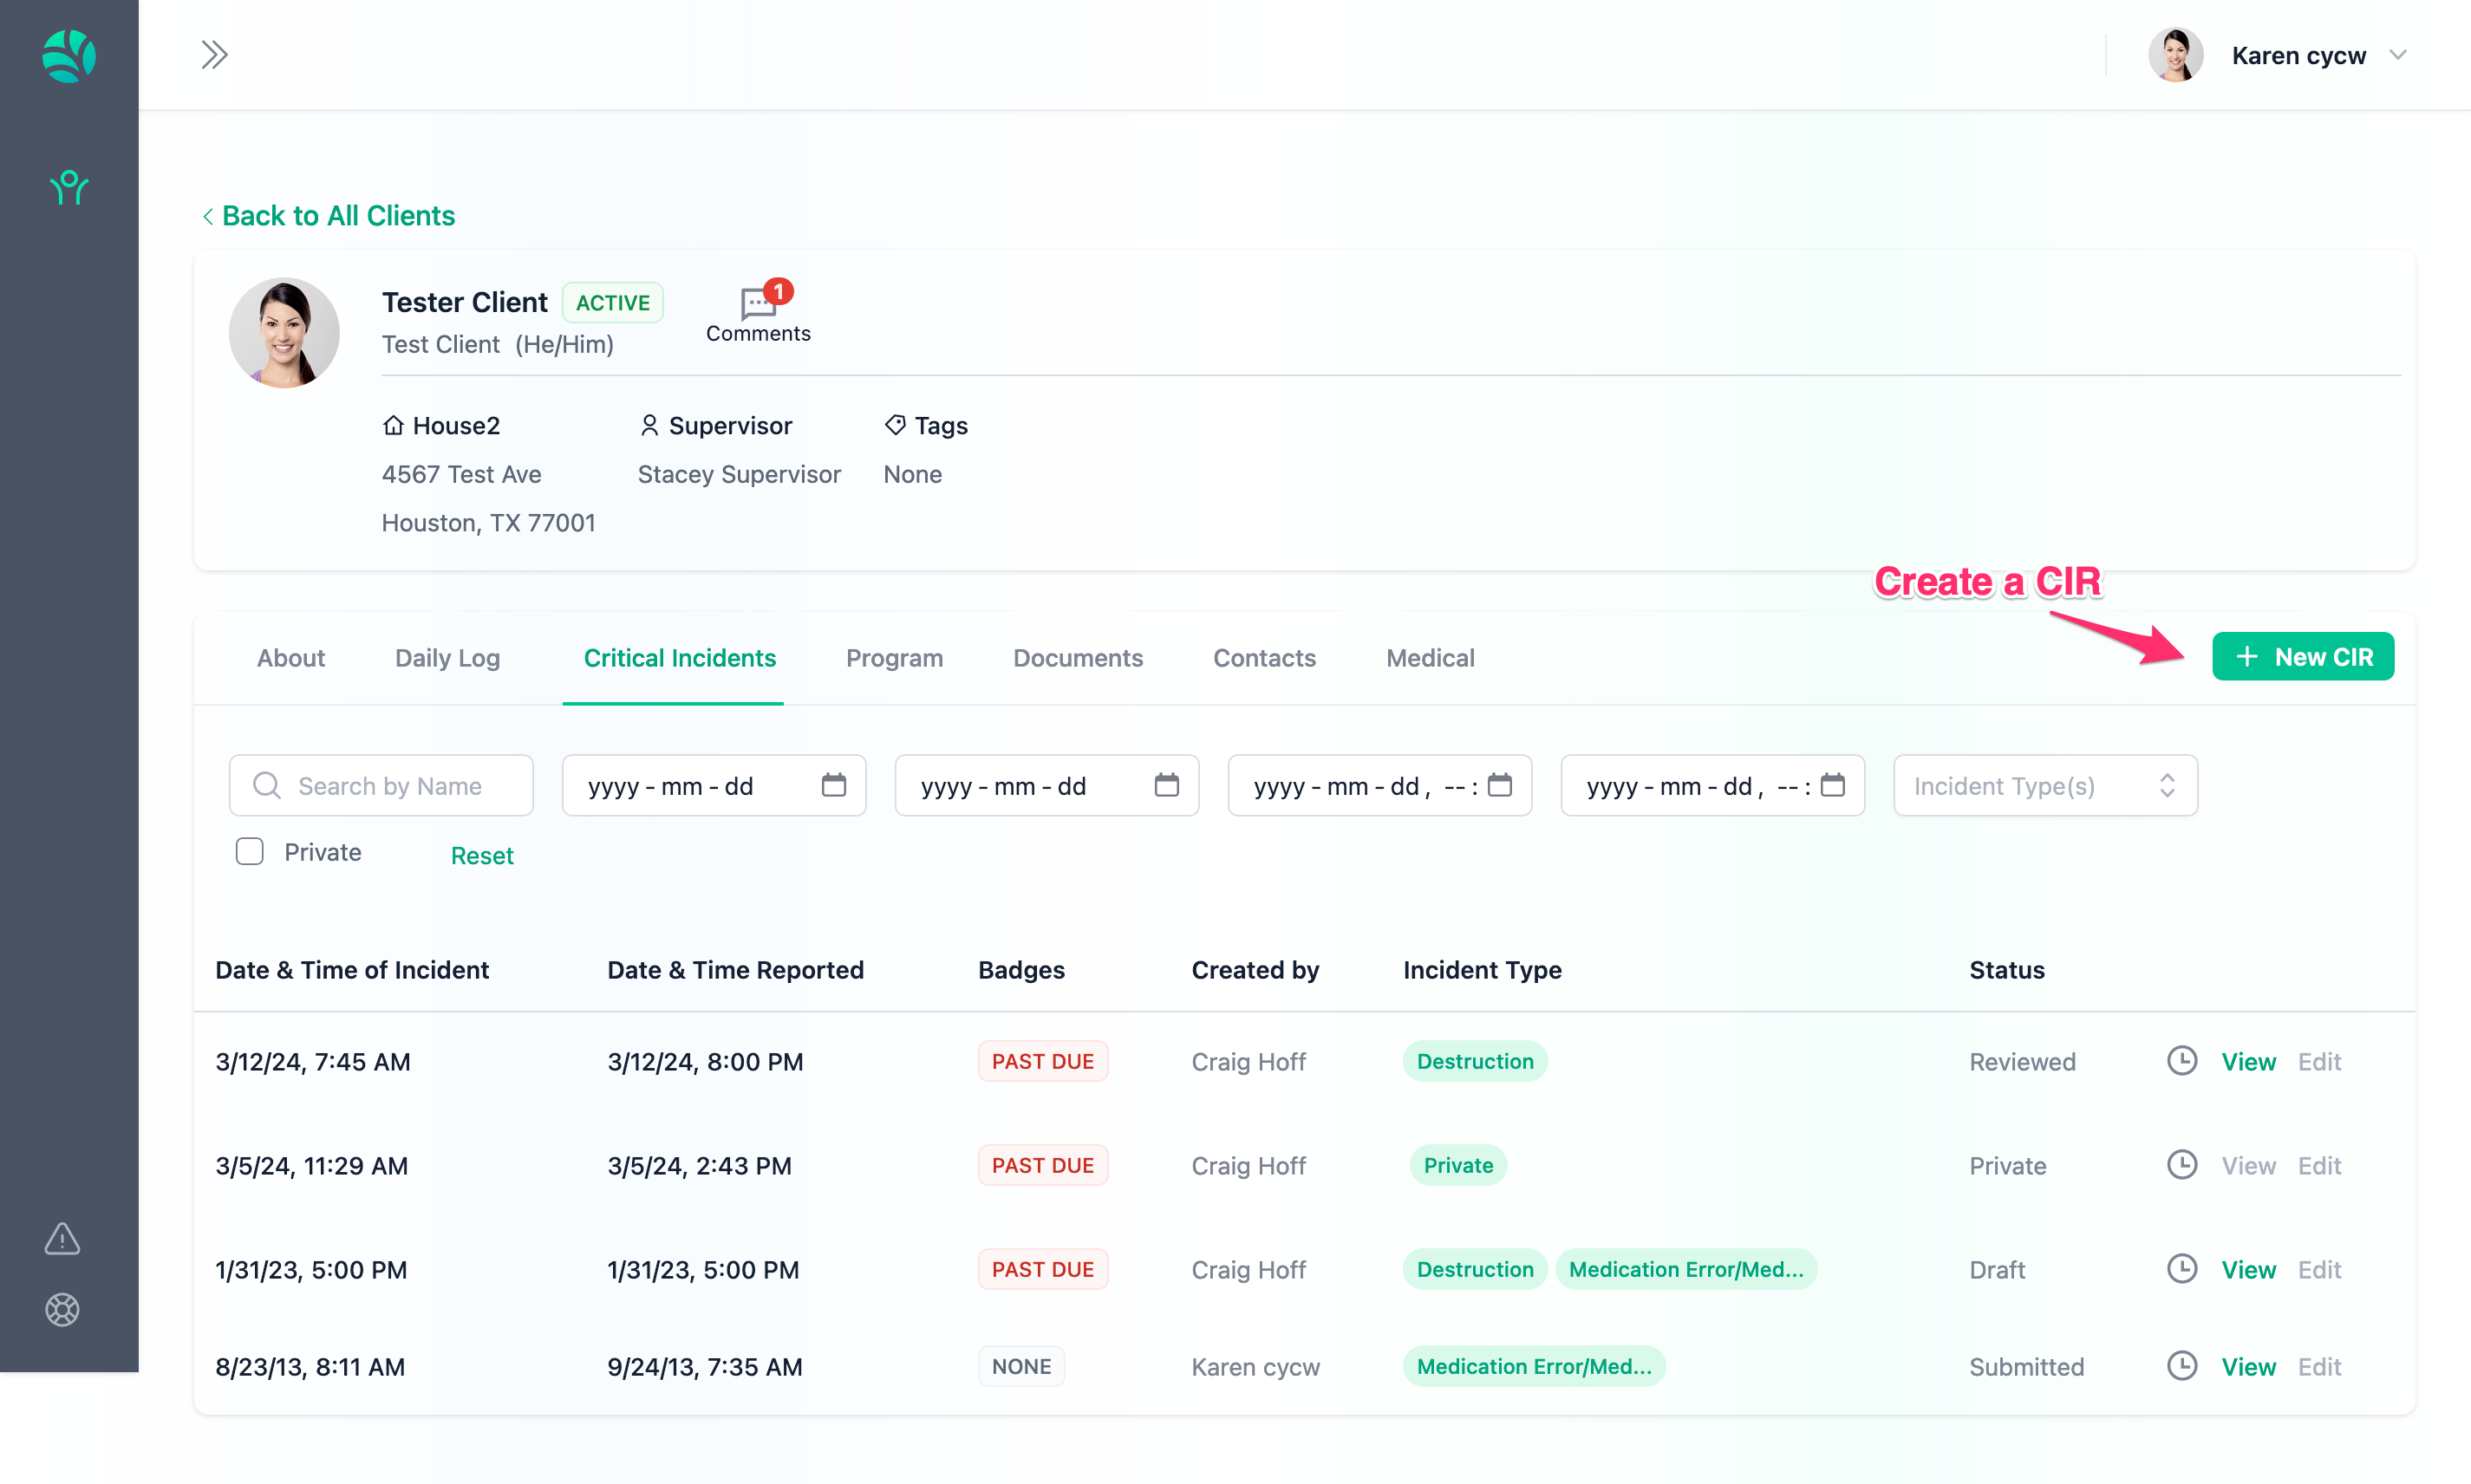
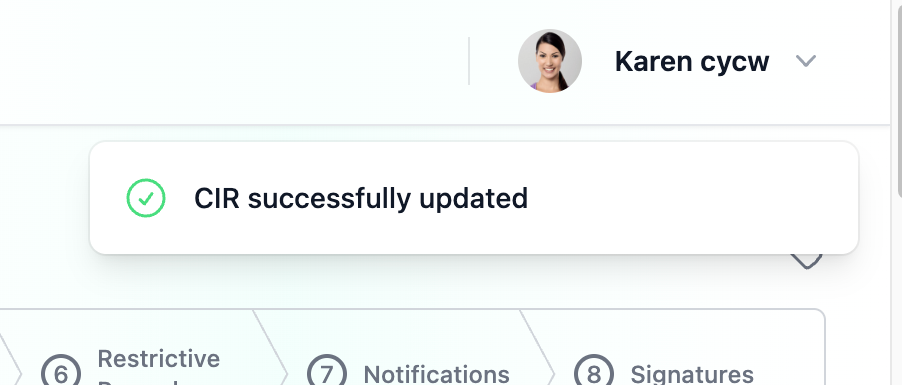
When you create a new CIR, the CIR is automatically saved as an "In-Progress" CIR. In this status, you can leave and come back to your CIR until you are ready to submit the incident.
Reporting a Critical Incident
Critical Incidents have 8 different sections (following the CFS Format).
Child or Youth's Information
Facility Information
Incident Background
Type of Incident
Incident Details
Restrictive Procedures
Notifications
Signatures
Follow all instructions in the Critical Incident Report form and ensure to fill out all required information.

Saving Progress on your CIR
Your CIR will automatically save every 2 minutes, ensuring your work is captured regularly. However, it’s important to periodically save your work manually by clicking the “Save” button. This will save your current progress without submitting or reporting the CIR.
You can view the last time your CIR was saved by looking at the footer of the page.
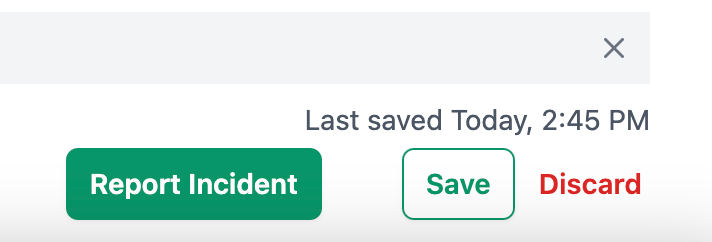
When you have completed the CIR, you can click on "Report Incident" to report the Critical incident.
Missing/Invalid Data
If your CIR doesn't submit after you click on "Report Incident", it may be because of missing/invalid data.

A message banner should appear at the top right to let you know whether the action was successful or not. Read the message carefully to see what went wrong. Scroll through your report for any instructions on what is required of you to successfully submit the CIR.

Access Permissions
As a Care Provider, you may create, view, and edit all your CIRs that are In-Progress and Draft. You cannot edit CIRs once they are Under Review, Reviewed, or Submitted.
You may also view all other CIRs that are not private and are in Submitted status.
Editing a Critical Incident
After successfully reporting a Critical Incident, you can make changes while the CIR is still in Draft status. To edit a reported CIR, go to the Critical Incident tab for your client, locate the CIR you want to update, and click “Edit.”
Critical Incident Audits
Critical Incident Audits are a timeline of revisions that indicate what was changed, who changed it, and when it was changed.
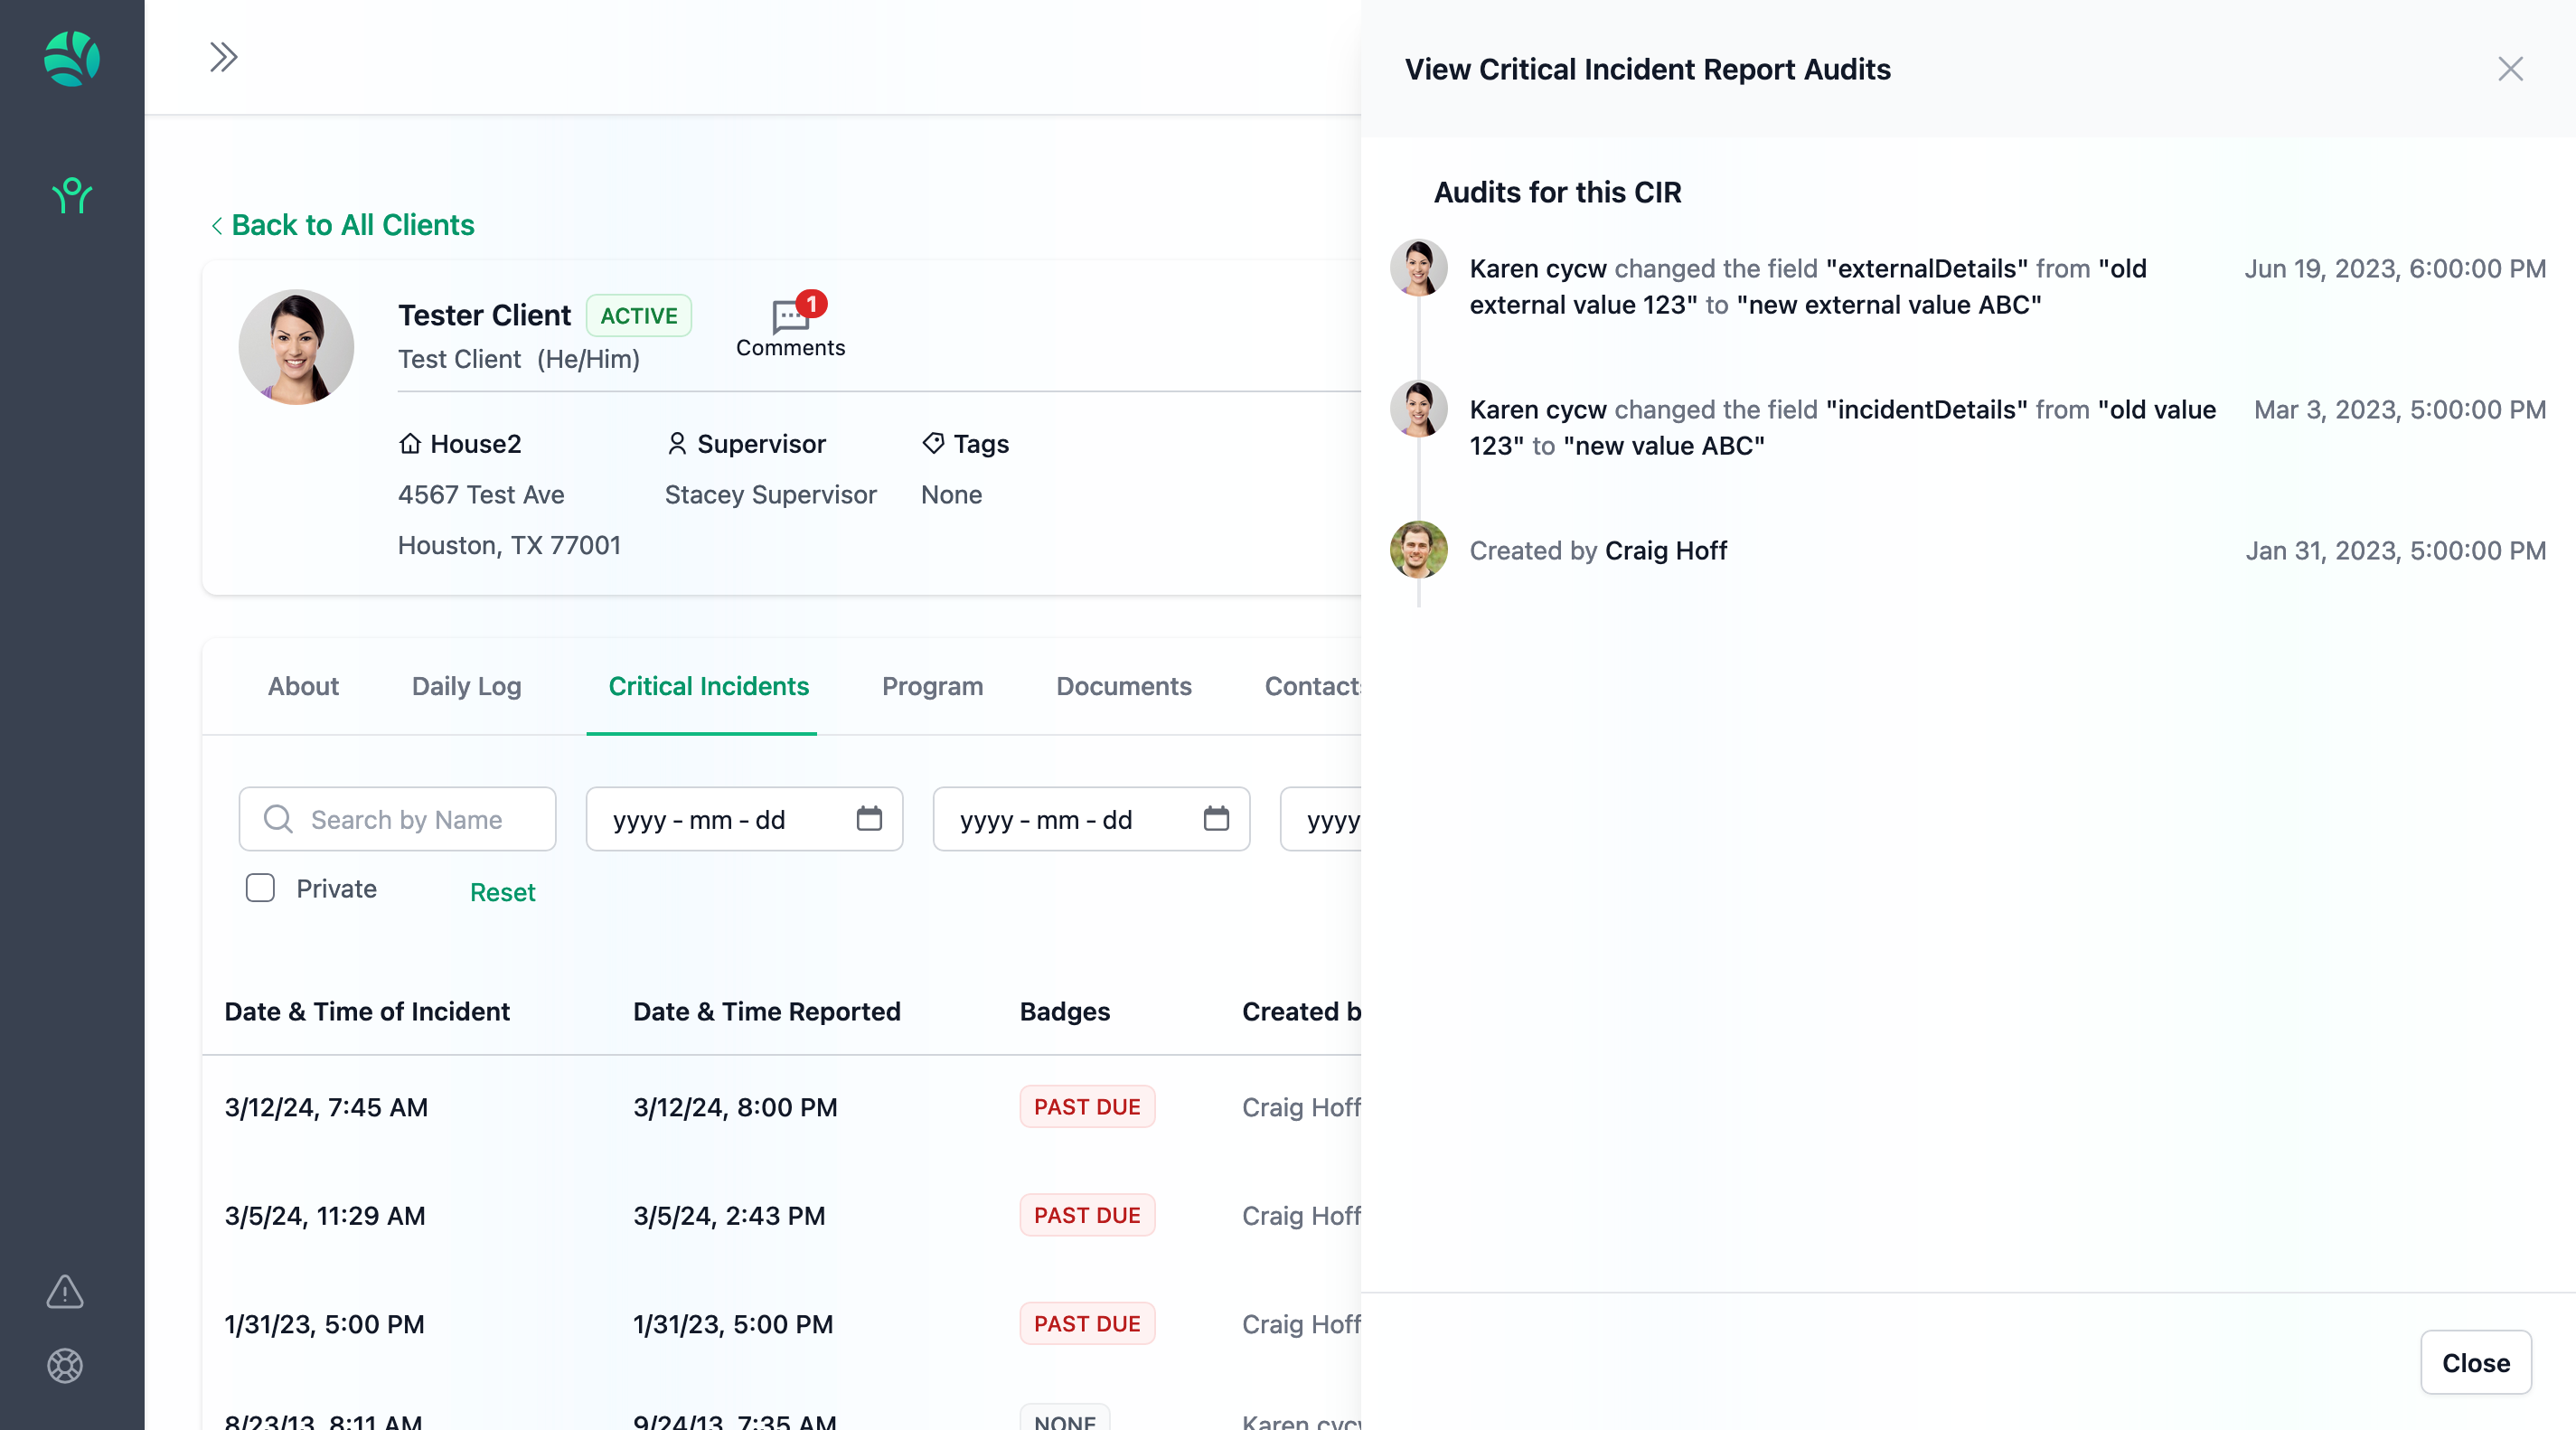
To view CIR Audits, click on the Clock Icon/Audits button of the CIR you wish to view the audits for. You can view audits from the CIR tab, the view page, and the edit page.
Private CIRs
CIR Privacy is a feature designed to protect the integrity of important legal documents. In Nurture, “Private” documents are hidden from all Care Providers except the submitter. The Care Provider who submits a Private CIR cannot edit the CIR after it is reported, regardless of its status.

By default, certain Critical Incident Types are automatically set as private, including:
Allegation of Abuse/Neglect
Death of Child
Staff/Caregiver Criminal Activity/Charges/Offences (or potential of)
Supervisors, Managers, and other Admin staff can mark any CIR as Private, regardless of the Incident Type. In such cases, the same restrictions will apply.
Program
The Program Tab in a Client Profile contains important information pertaining to the type of care the child is receiving as well as all the care providers accountable to deliver this care.
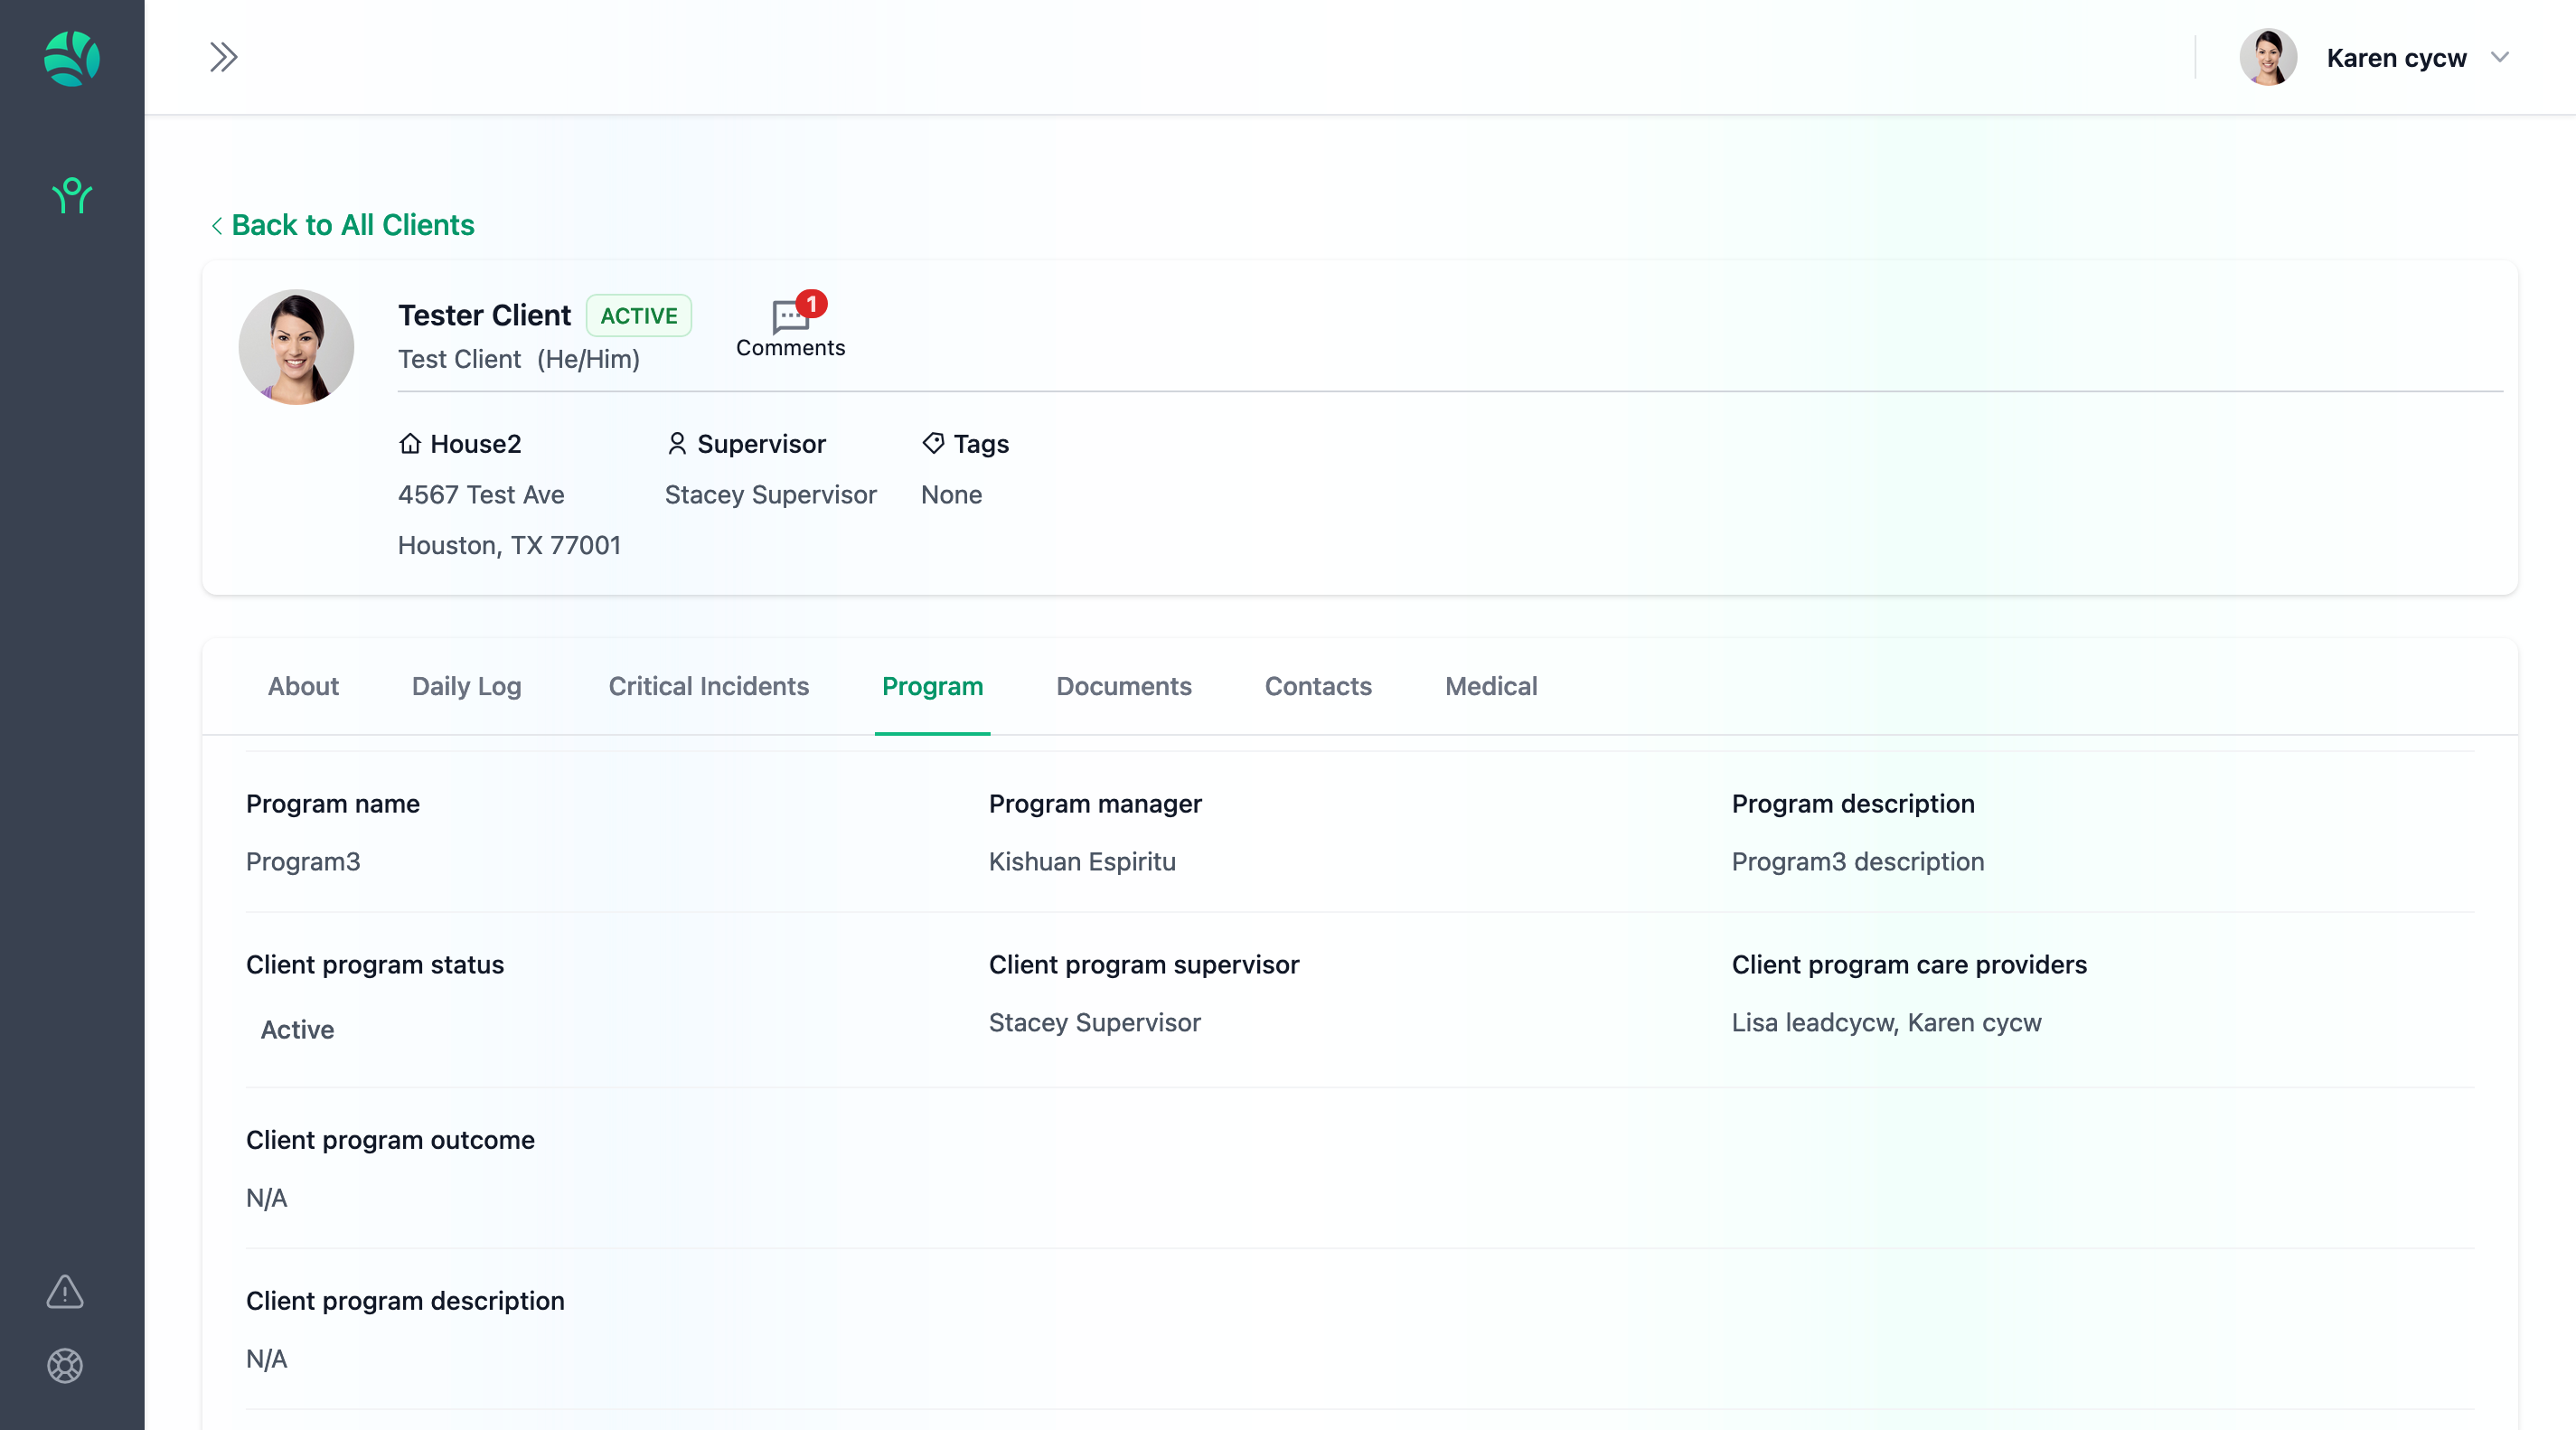
Access Permissions
As a Care Provider, you have the ability to view all the details in the Program tab. However, you cannot make any changes to the Program fields.
Documents
The Documents tab is a repository in a Client Profile to store important records, legal documents, case files, and other relevant files.
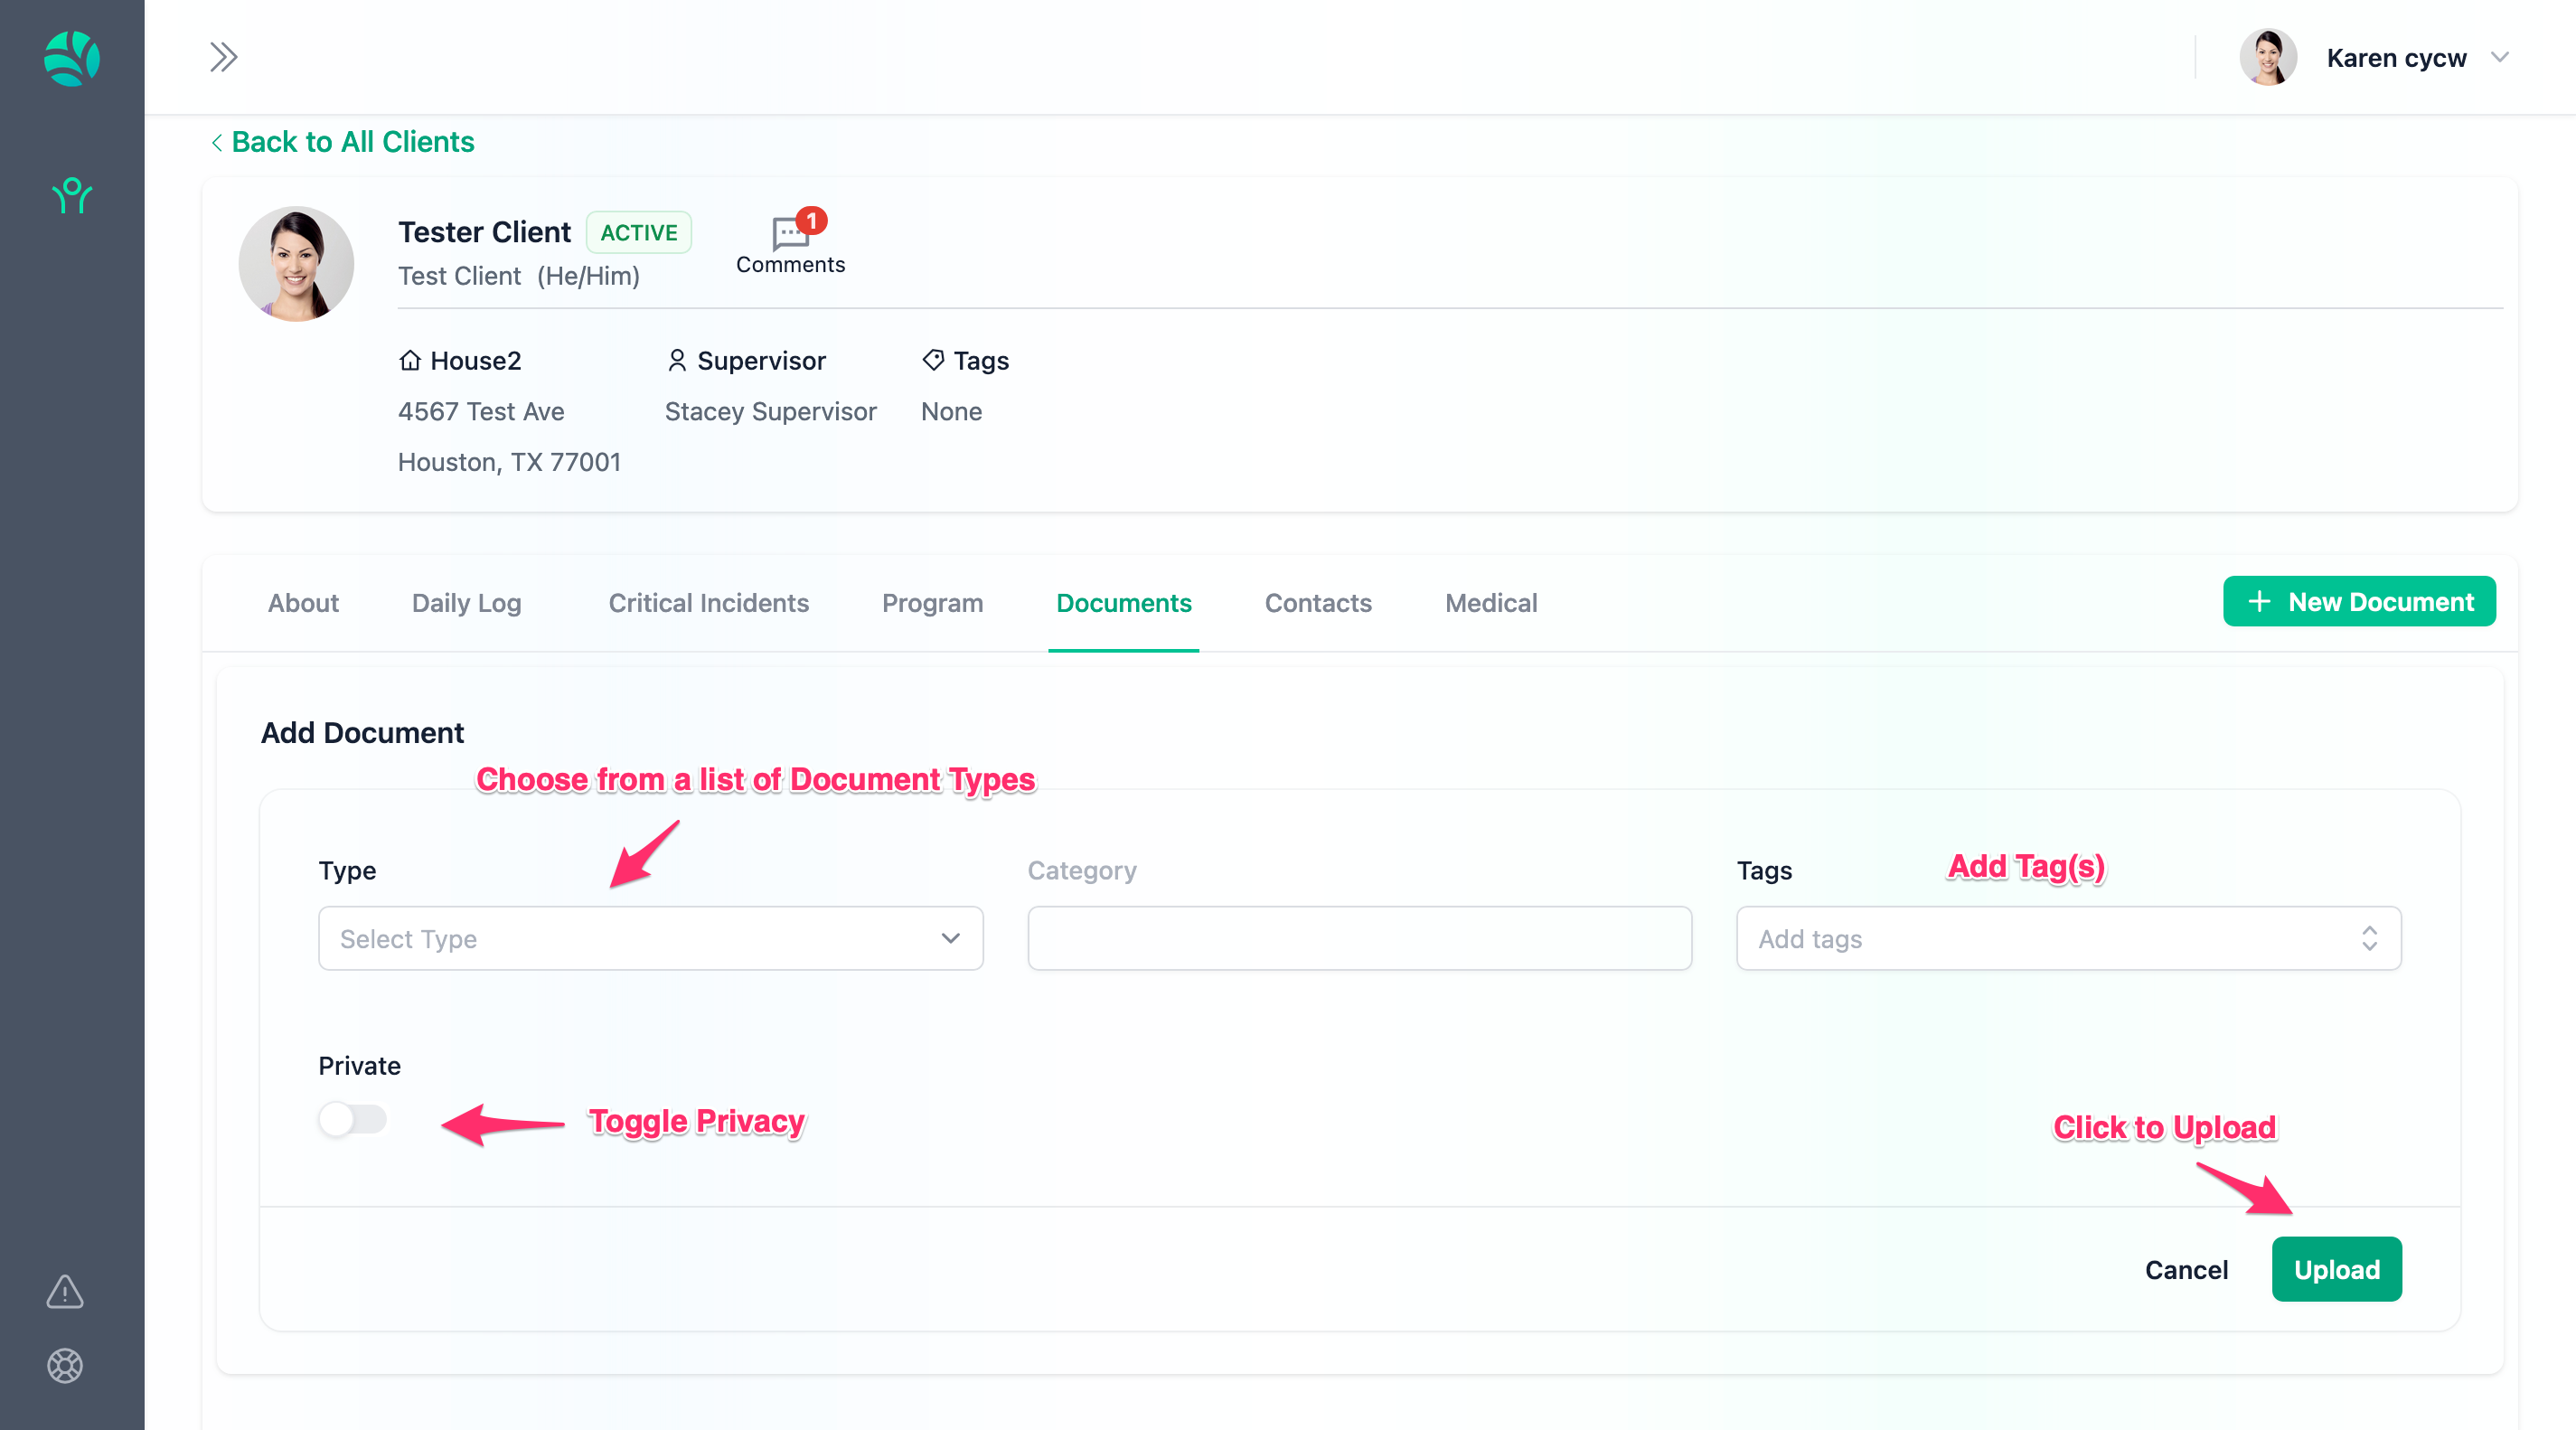
Private Documents
Document Privacy is a feature designed to protect the integrity of important legal documents. In Nurture, “Private” Documents are hidden from all Care Providers including the submitter.
Access Permissions
As a Care Provider, you can upload and edit your own documents. You can download and view all documents but cannot edit those you didn’t upload yourself. If a document is set to private, you will not be able to view it, including your own documents.
Contacts
Contacts help identify important individuals who may be relevant to the client’s care, such as the child’s legal guardian, psychiatrist, or physician.
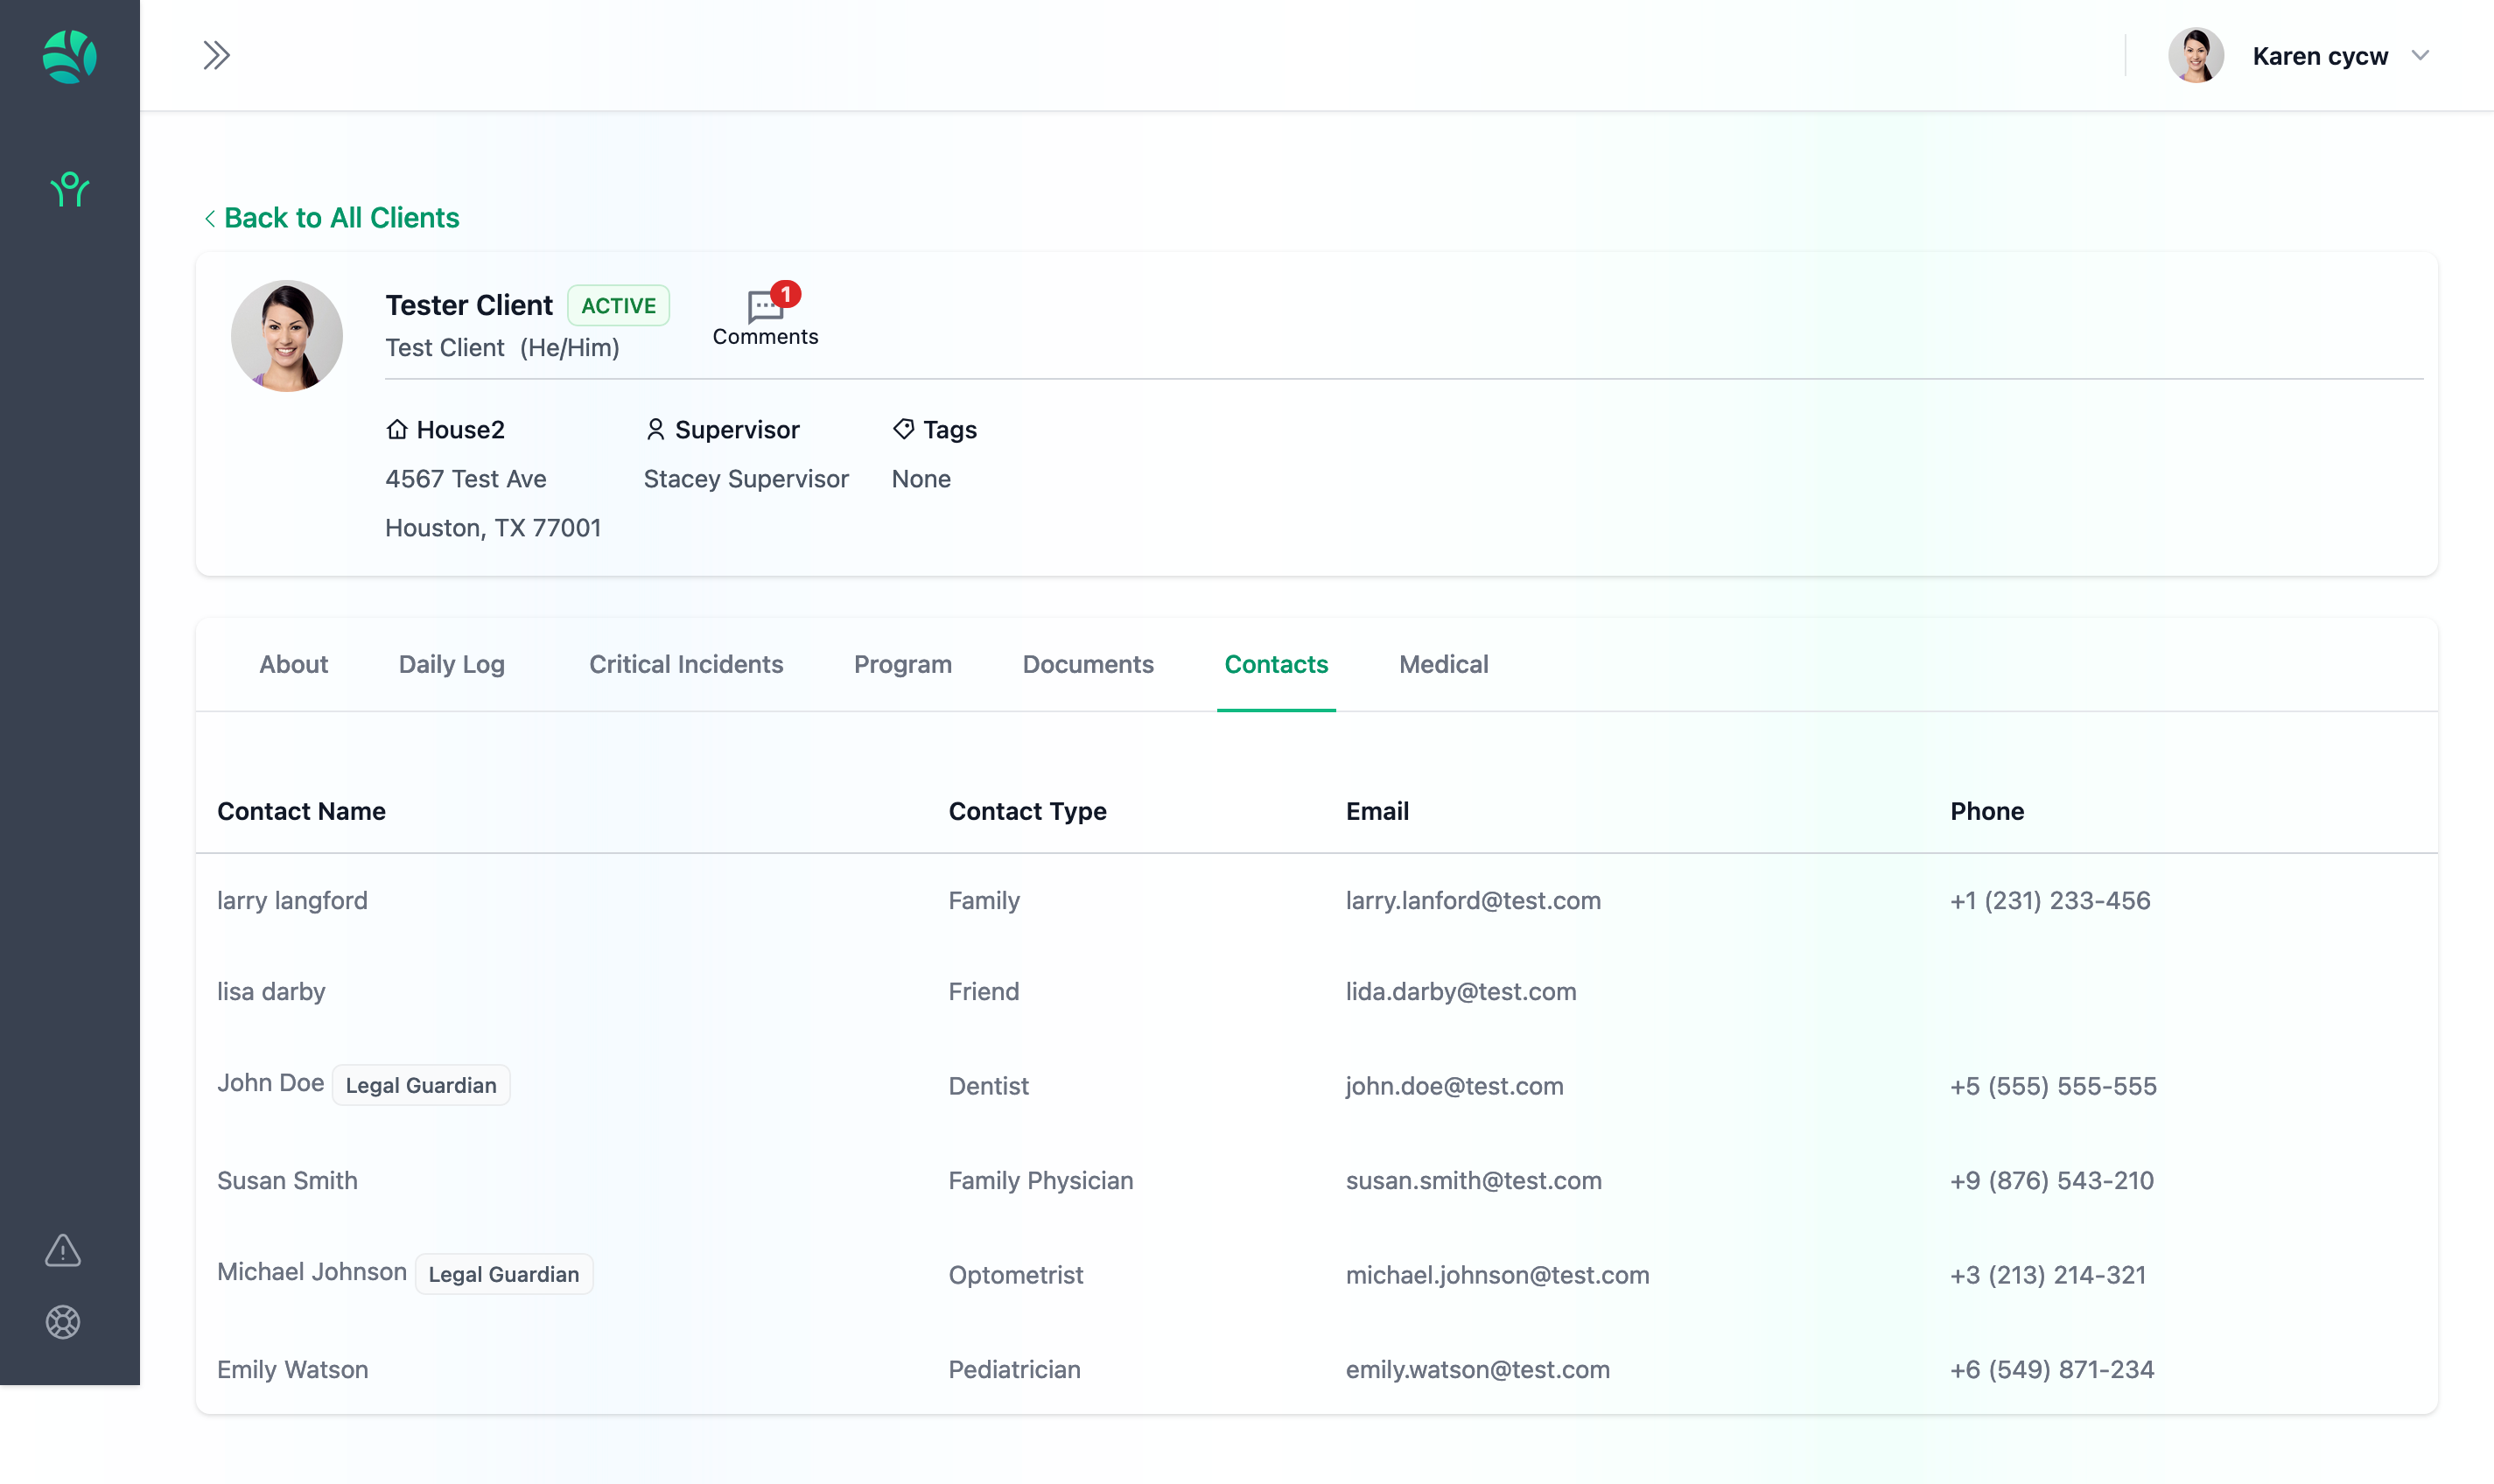
Access Permissions
As a Care Provider, you can view contact information but cannot edit or create new contacts.
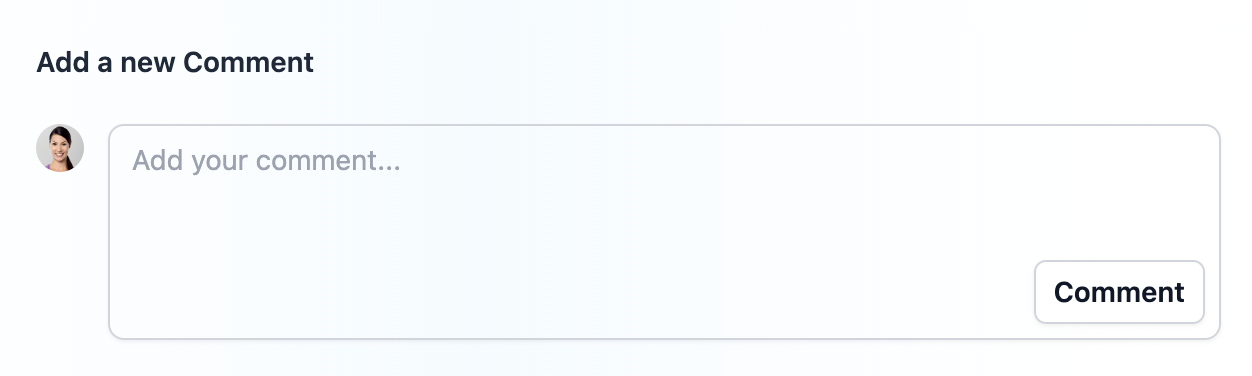
Comments
Comments on Nurture are a great way to start communication threads with your team. Comments on Client Profiles allow you to share announcements, ask questions, and document any other dated notes outside of Daily Logs.

Posting a Comment
Posting a comment is simple. Locate the comment box near the Comment tab, type your comment, and click "Comment".
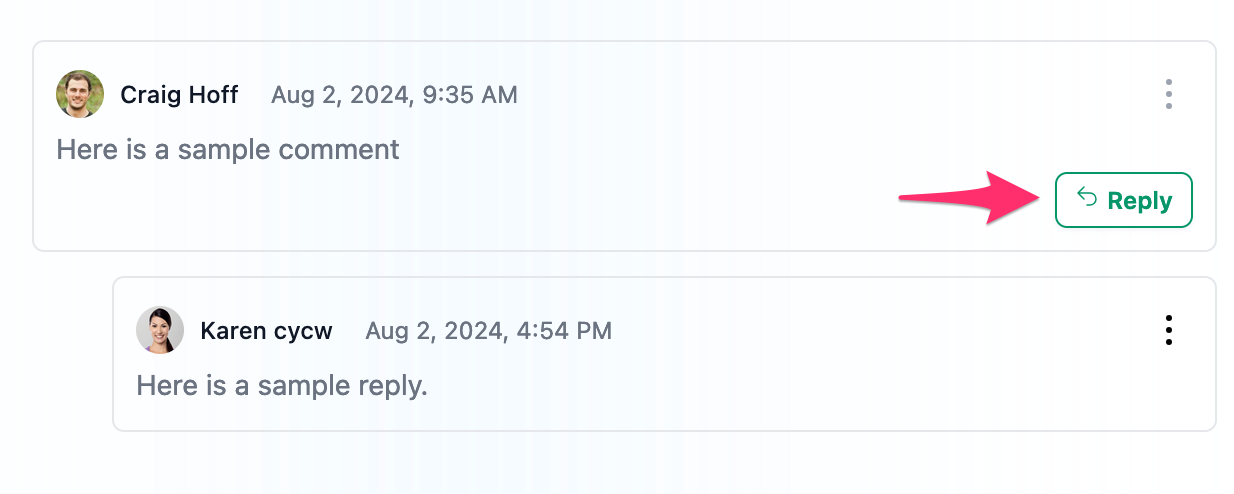
Posting a Reply
To reply to any comment thread, find the comment you wish to reply to and click on "Reply".
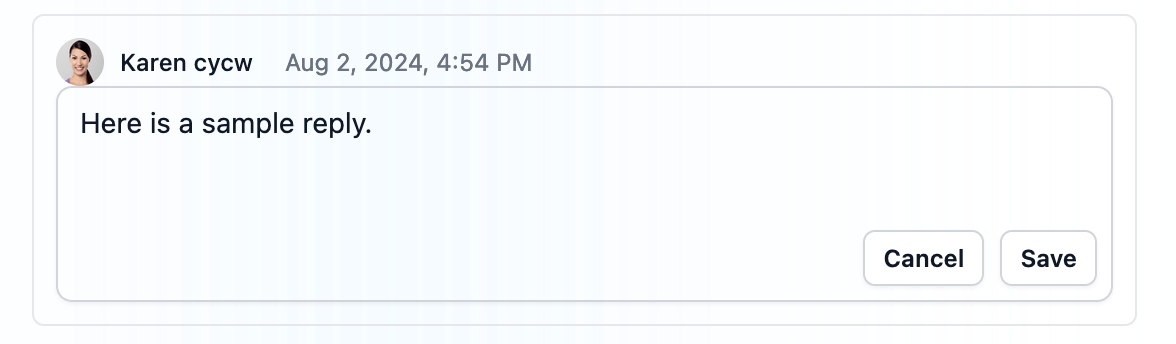
Editing your Comment/Reply
To edit your comment, double click on it. The comment can now be adjusted and you can save your changes by clicking "Save". Optionally, you can press "Cancel" if you change your mind.
Access Permissions
As a Care Provider, you can post and reply comments on any client profile you have access to. You can edit any comment you post.
Tags
Tags are used throughout Nurture as a convenient way to classify and group items, making them easier to filter later on.
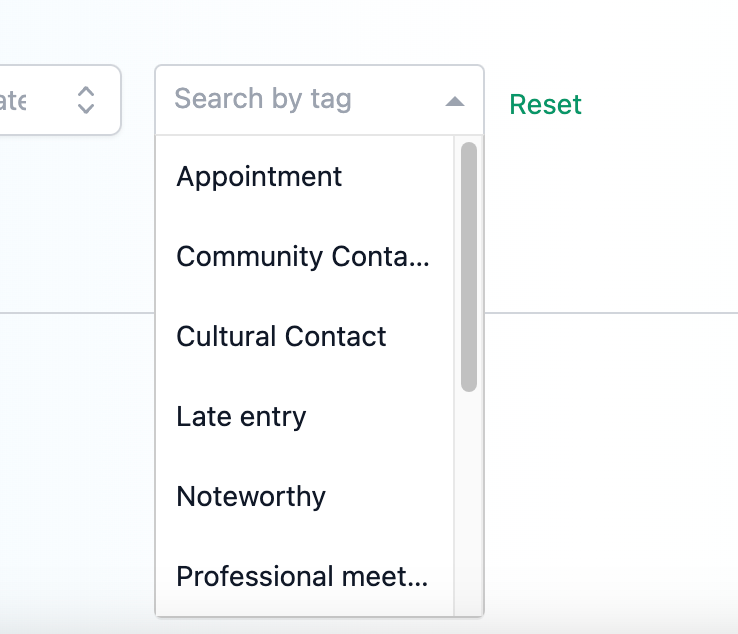
In the Daily Log and Document tabs, you have the option to add multiple tags to your entries. This allows you to use the search filters to locate your log or document by applying the tag filter.
Access Permissions
As a Care Provider, you can add tags to your Daily Logs and Documents